What is Instant Capture?
Instant Capture is Ottimate's AI-powered invoice processing tool. Instead of routing invoices through the standard data-entry pipeline, Instant Capture uses AI to automatically extract and code invoice data, including header fields, line items, GL codes, vendor, and tax, in real time. You review the extracted data, correct anything flagged, and create the invoice directly.
Supported Workflows
1. Upload New Invoices via Instant Capture
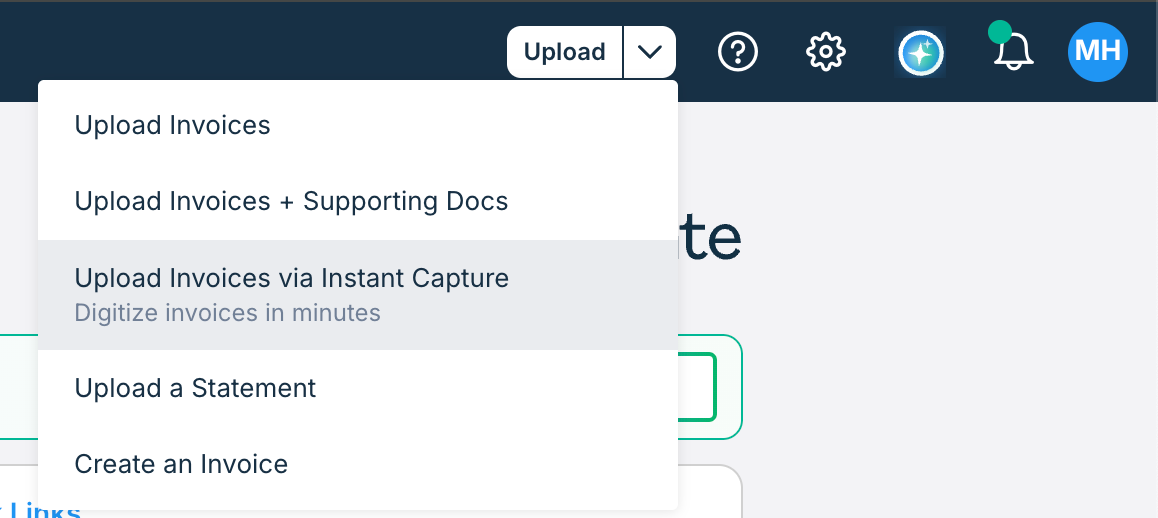
From the Invoices page, click Upload in the upper-right corner, then click the dropdown arrow (∨) and select Upload Invoices via Instant Capture. You can also access this from the Home page.
Drag and drop your invoice files onto the upload area, or click Browse files to select them from your computer. Accepted formats: JPG, PNG, and PDF.
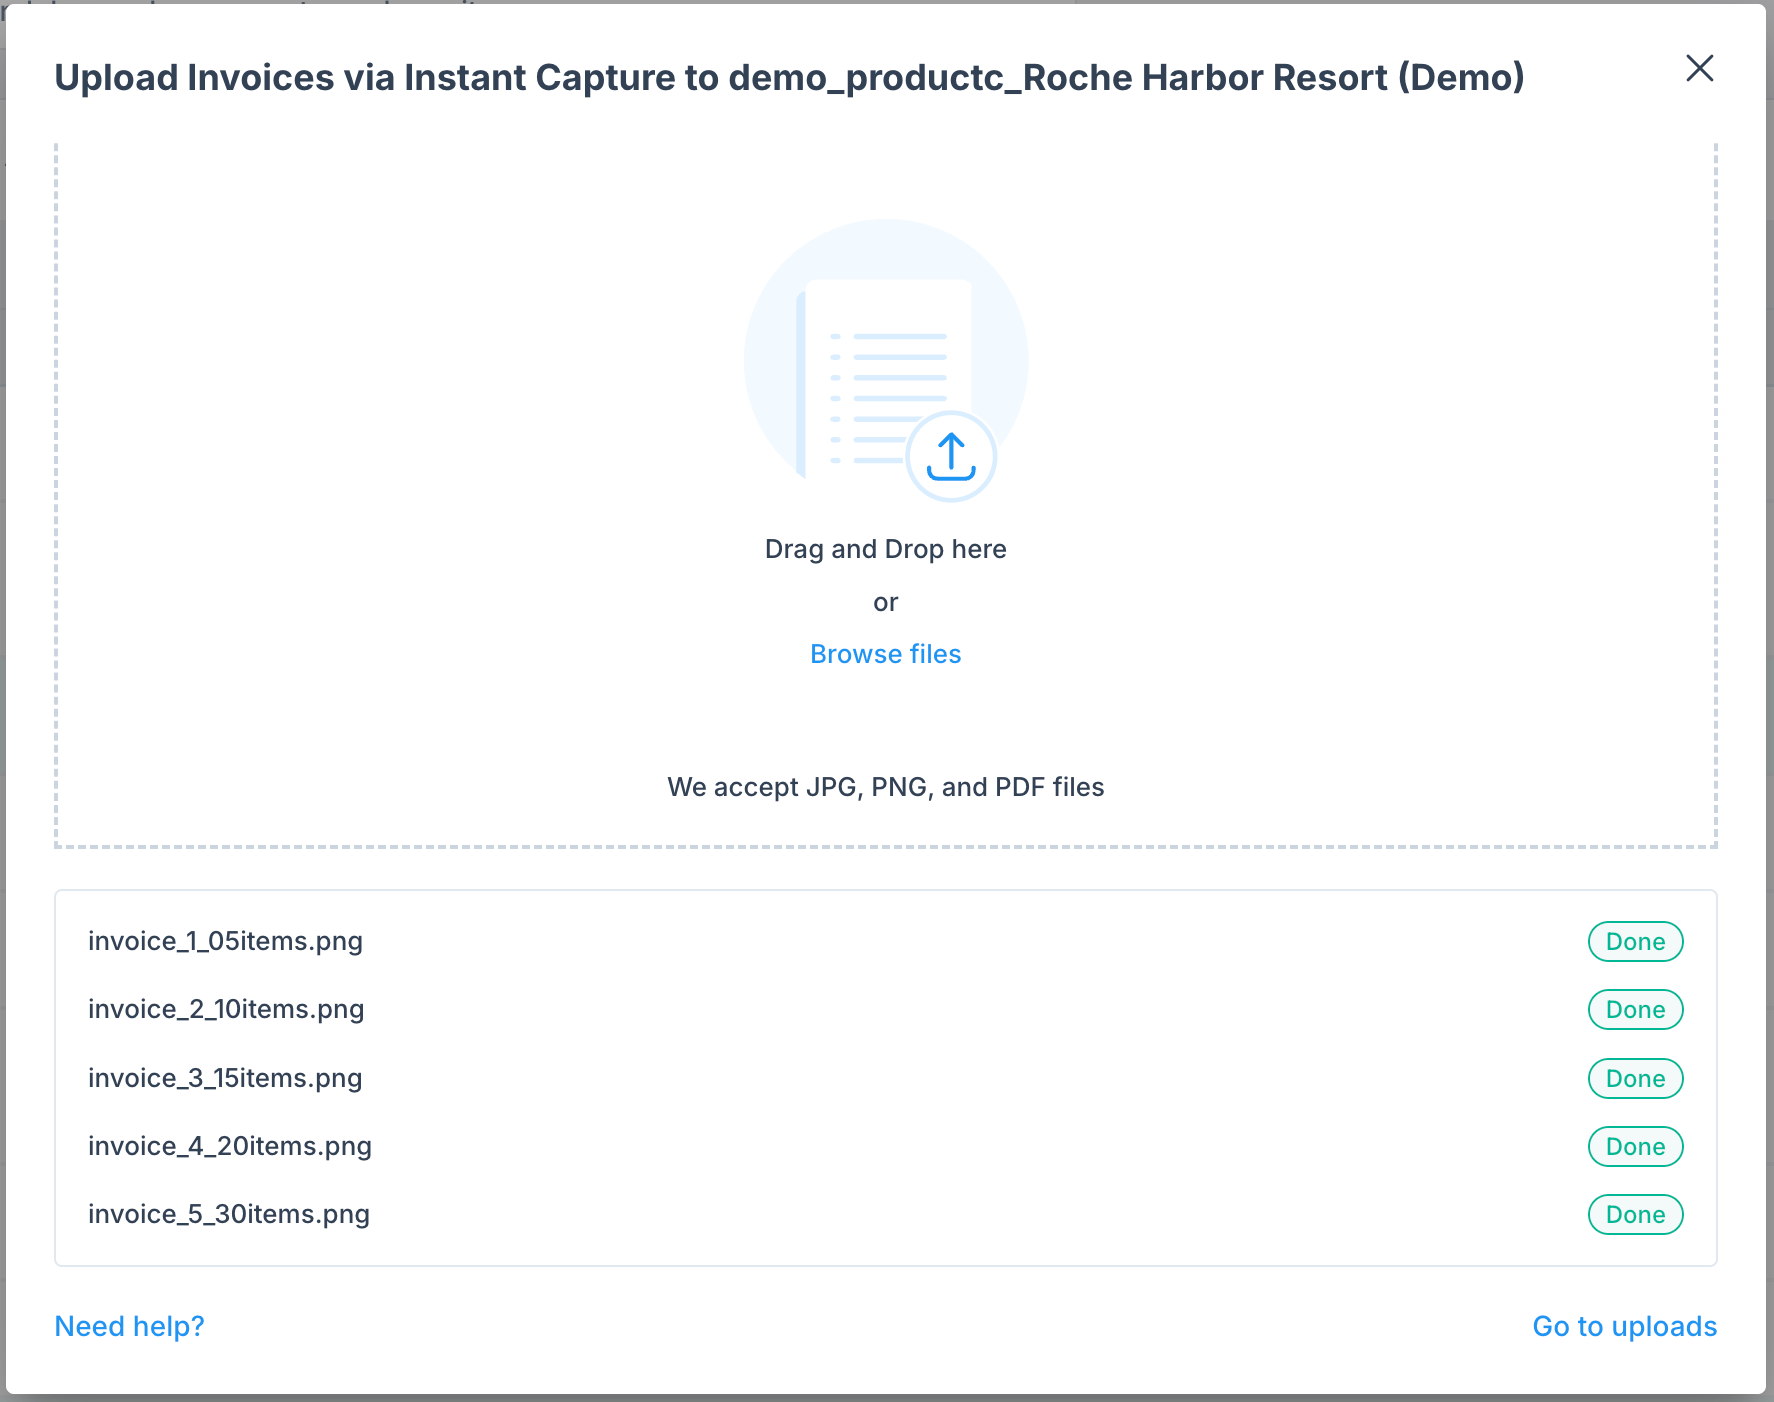
Once your files are uploaded, click Go to uploads (bottom-right of the dialog) to open the Instant Capture queue.
2. Capture Existing Uploads
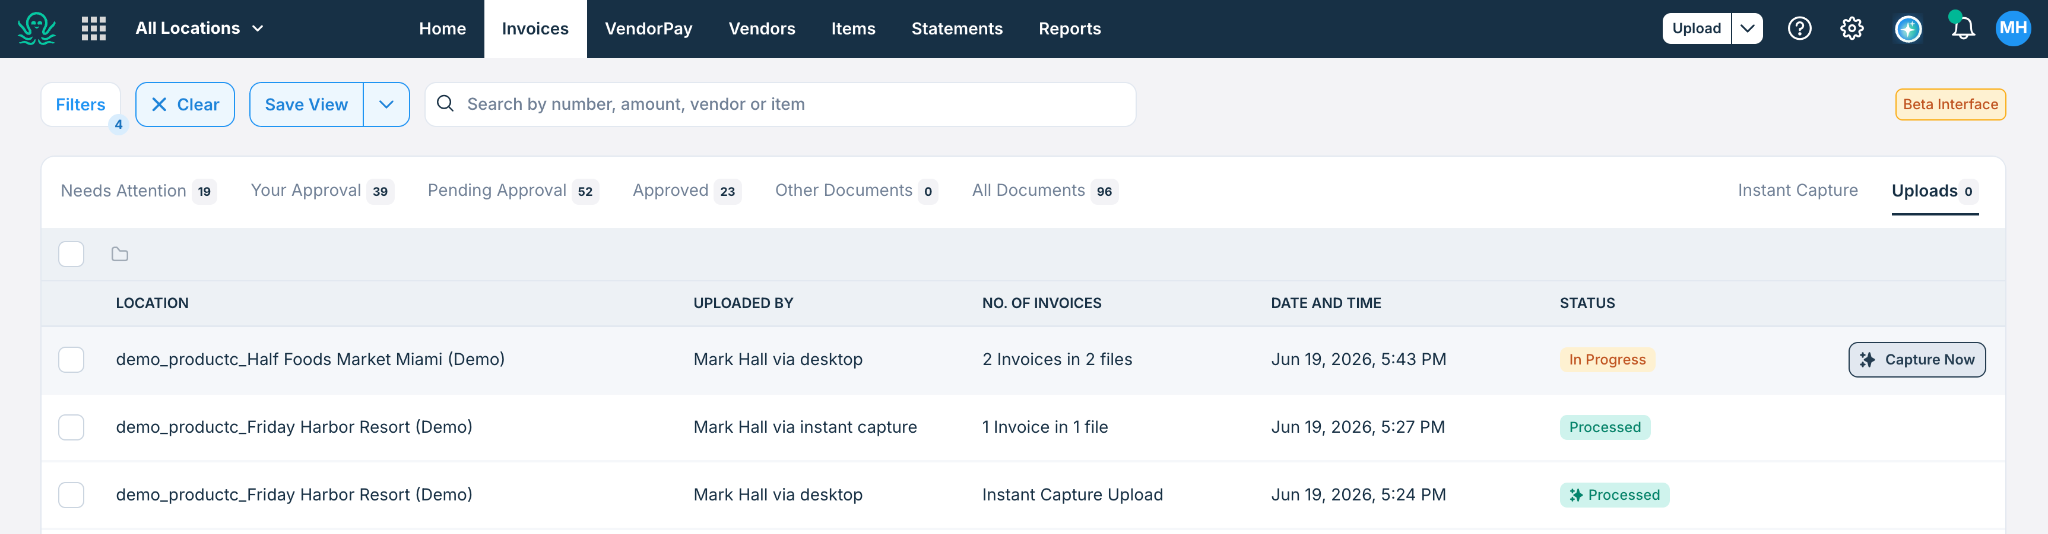
From the Invoices page, click the Uploads tab (to the right of the invoice status tabs).
Find the invoice you want to process. If it shows a Capture Now button, click it to send it through Instant Capture.
Instant Capture will extract and code the invoice for your review.
The Instant Capture Queue
After uploading, your files appear in the Instant Capture tab on the Invoices page. Each file shows its processing status:
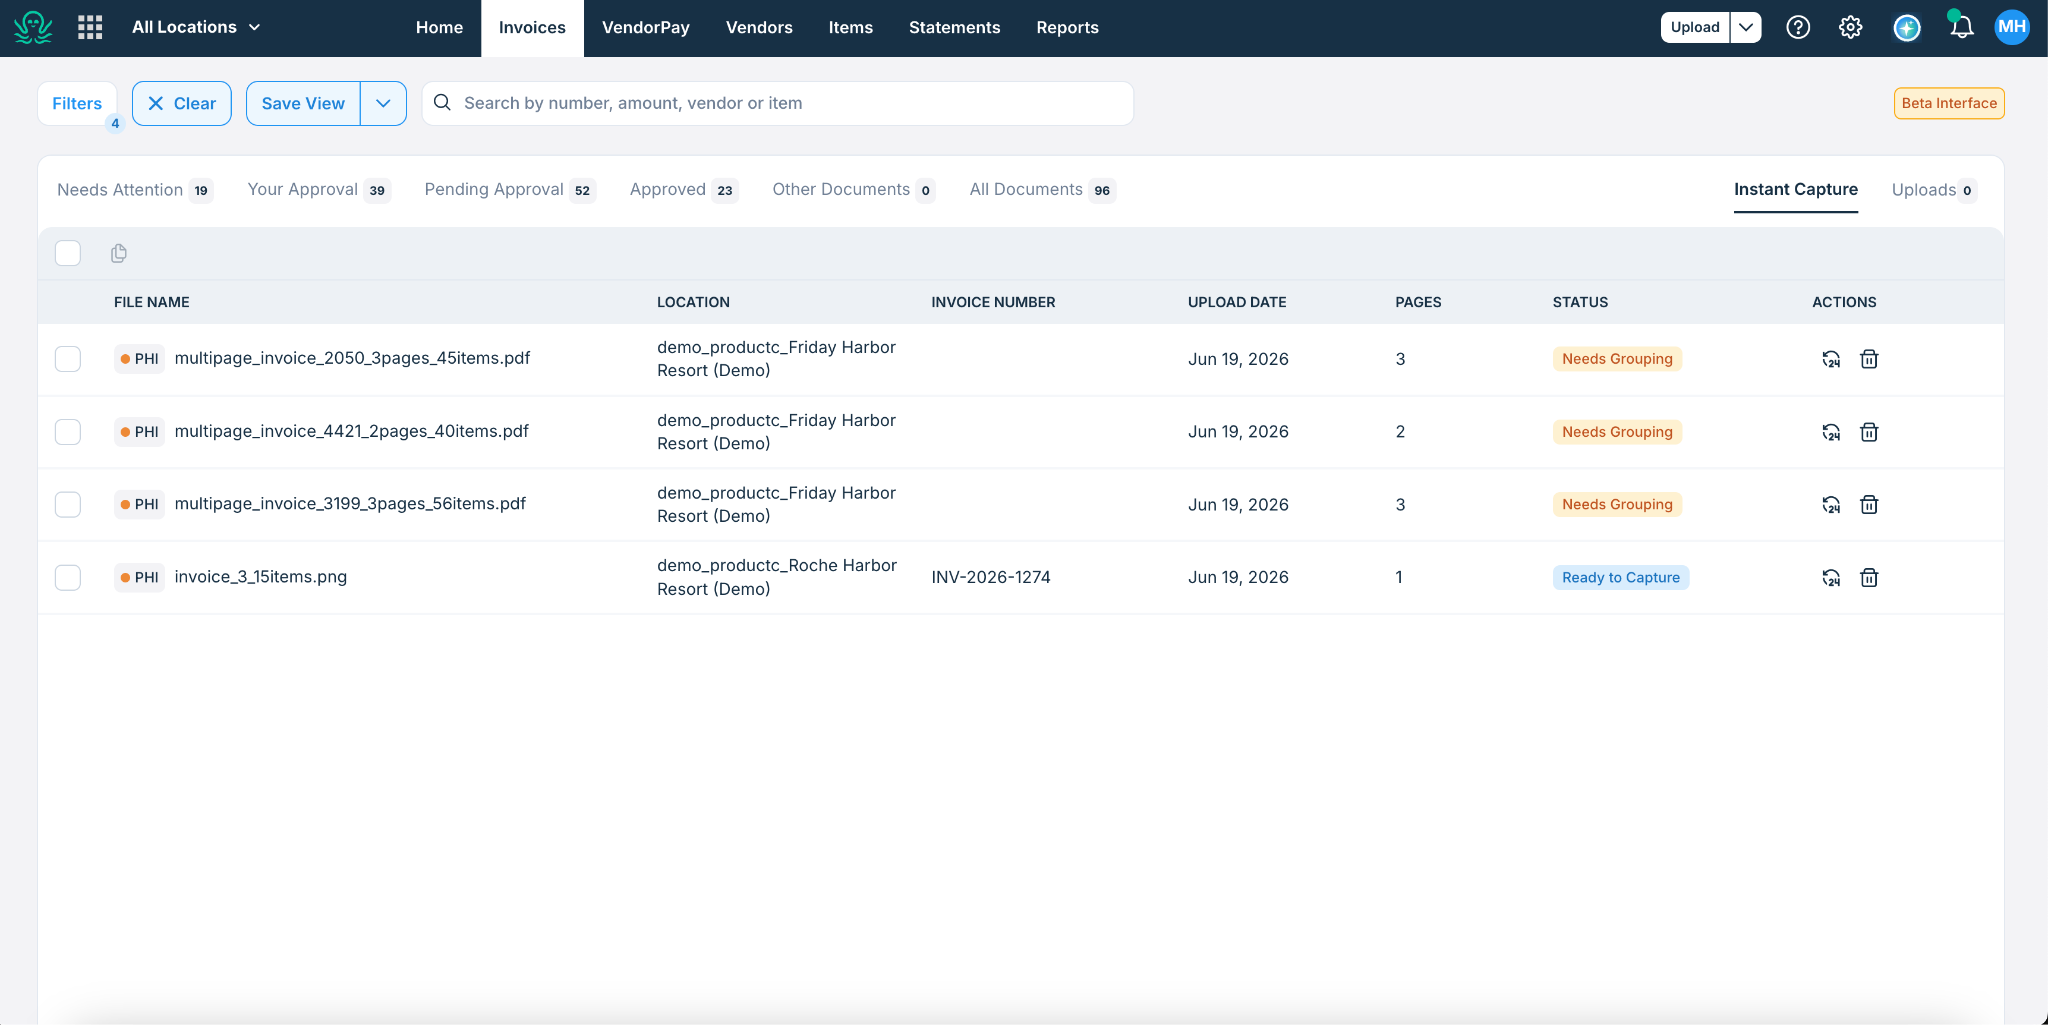
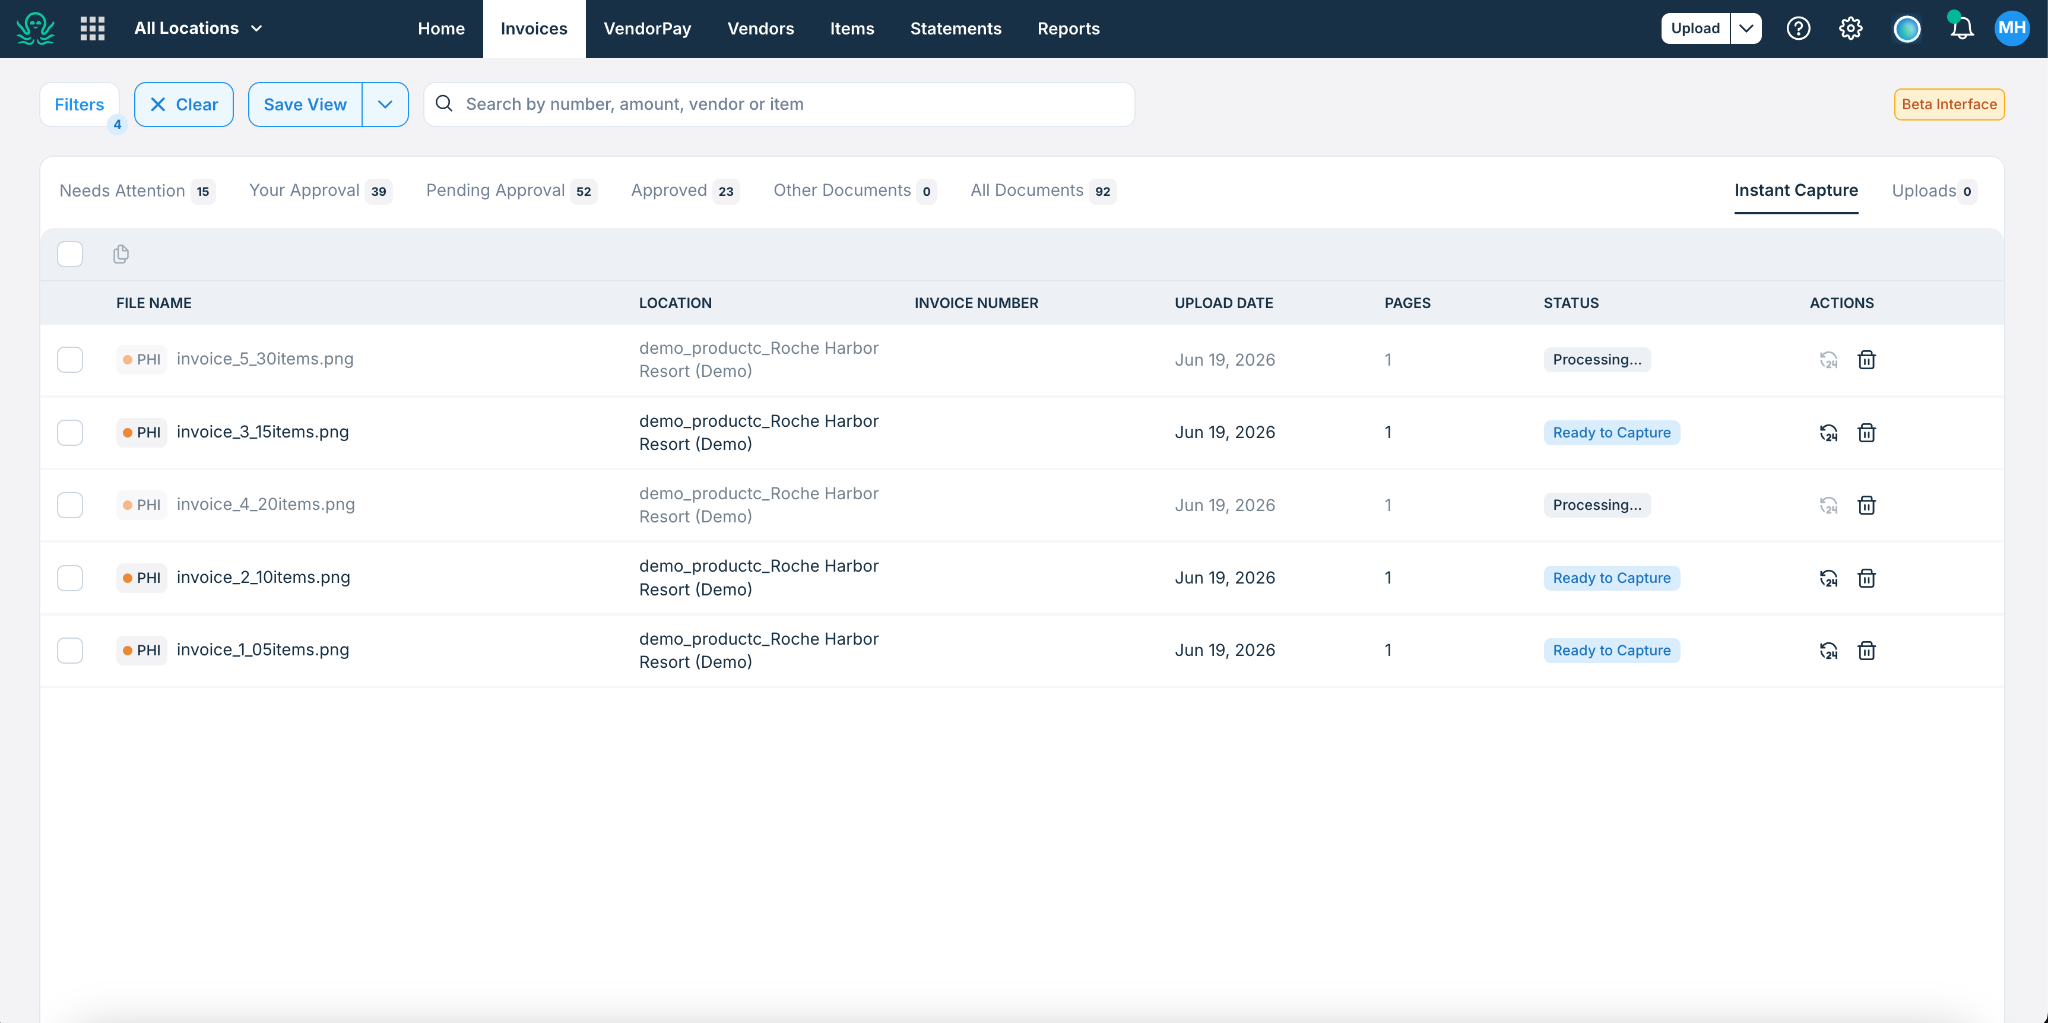
Files marked with an orange PHI dot contain sensitive health information and will be handled accordingly.
Page Grouping
When a multi-page PDF is uploaded, Instant Capture needs to know which pages belong to the same invoice. There are two ways this works:
Automatic Grouping (Yes/No)
For files with consecutive pages, Instant Capture walks you through the pages two at a time:
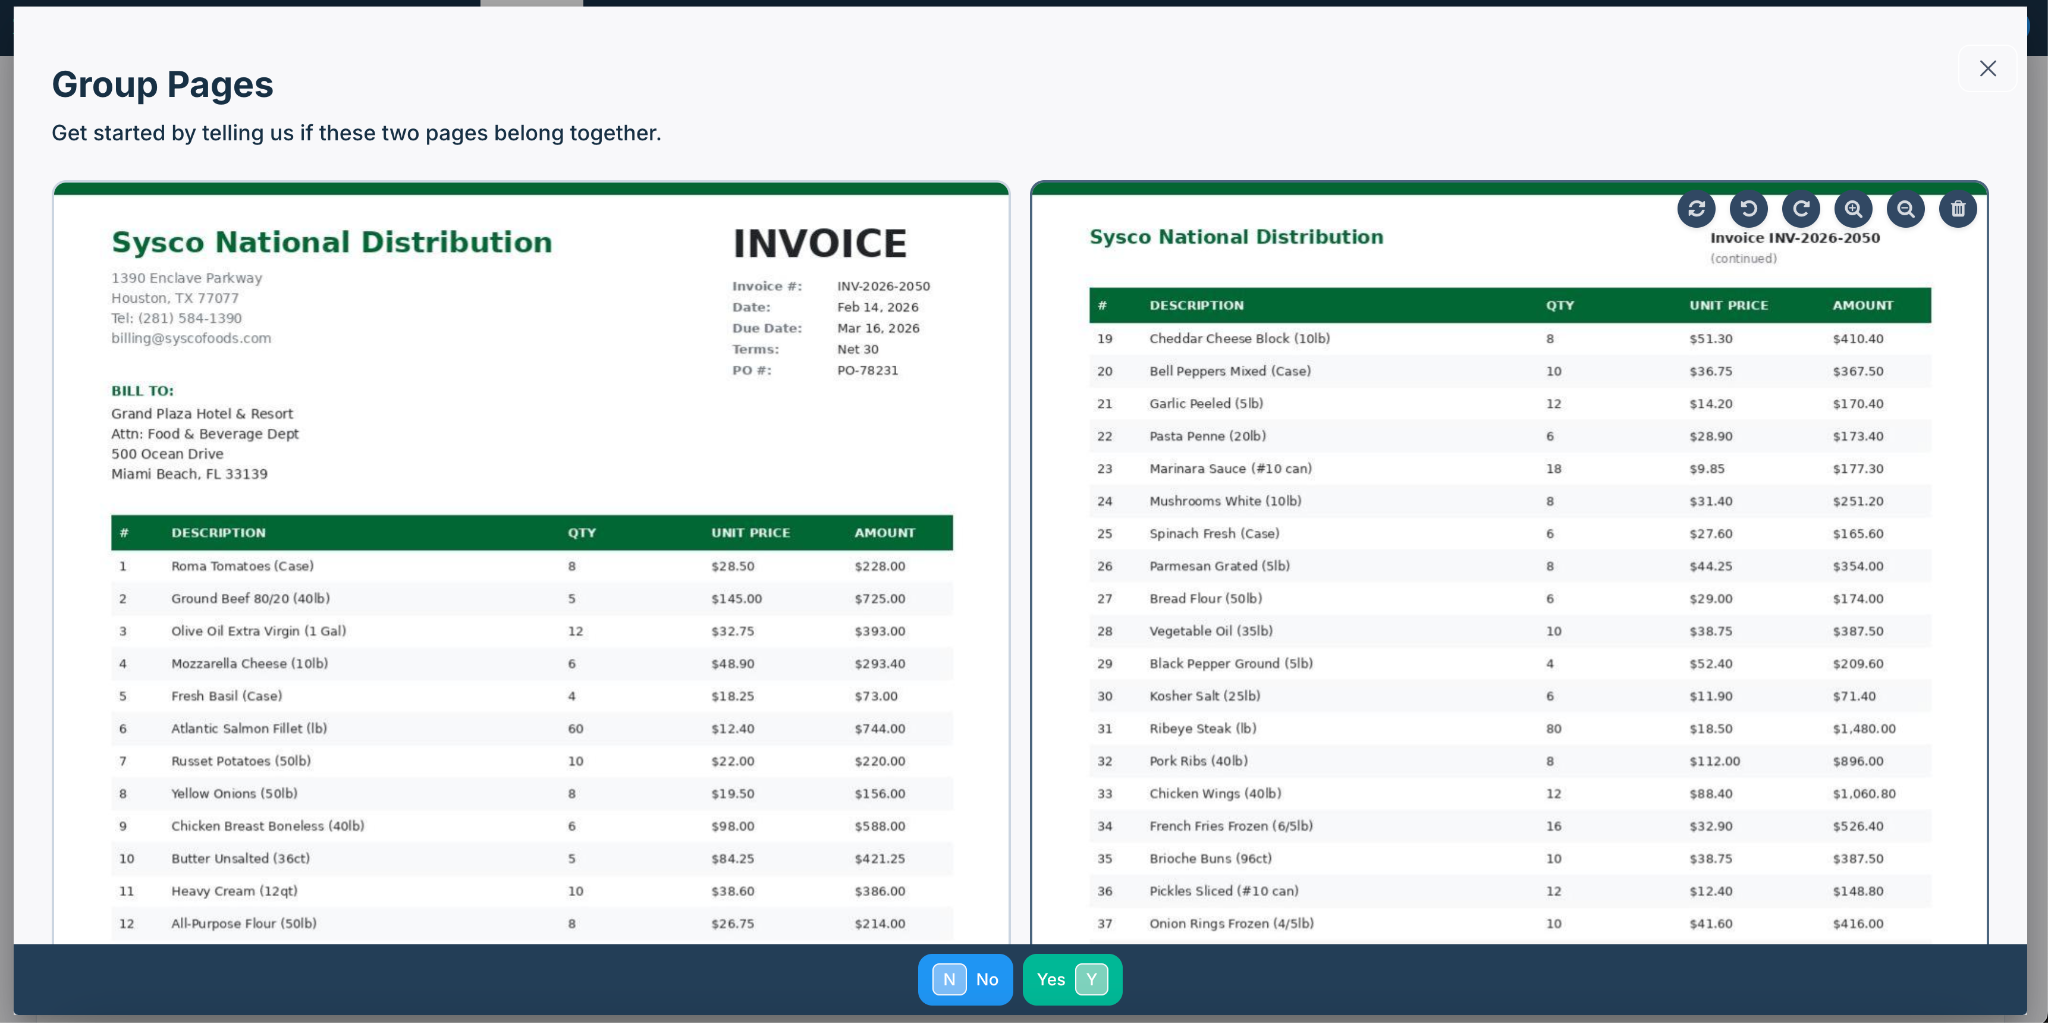
The modal shows "Get started by telling us if these two pages belong together."
Click Yes (or press Y) if the two pages are part of the same invoice.
Click No (or press N) if they are separate invoices.
Continue until all pages are grouped.
Manual Grouping
If you have multiple files or pages that need to be combined:
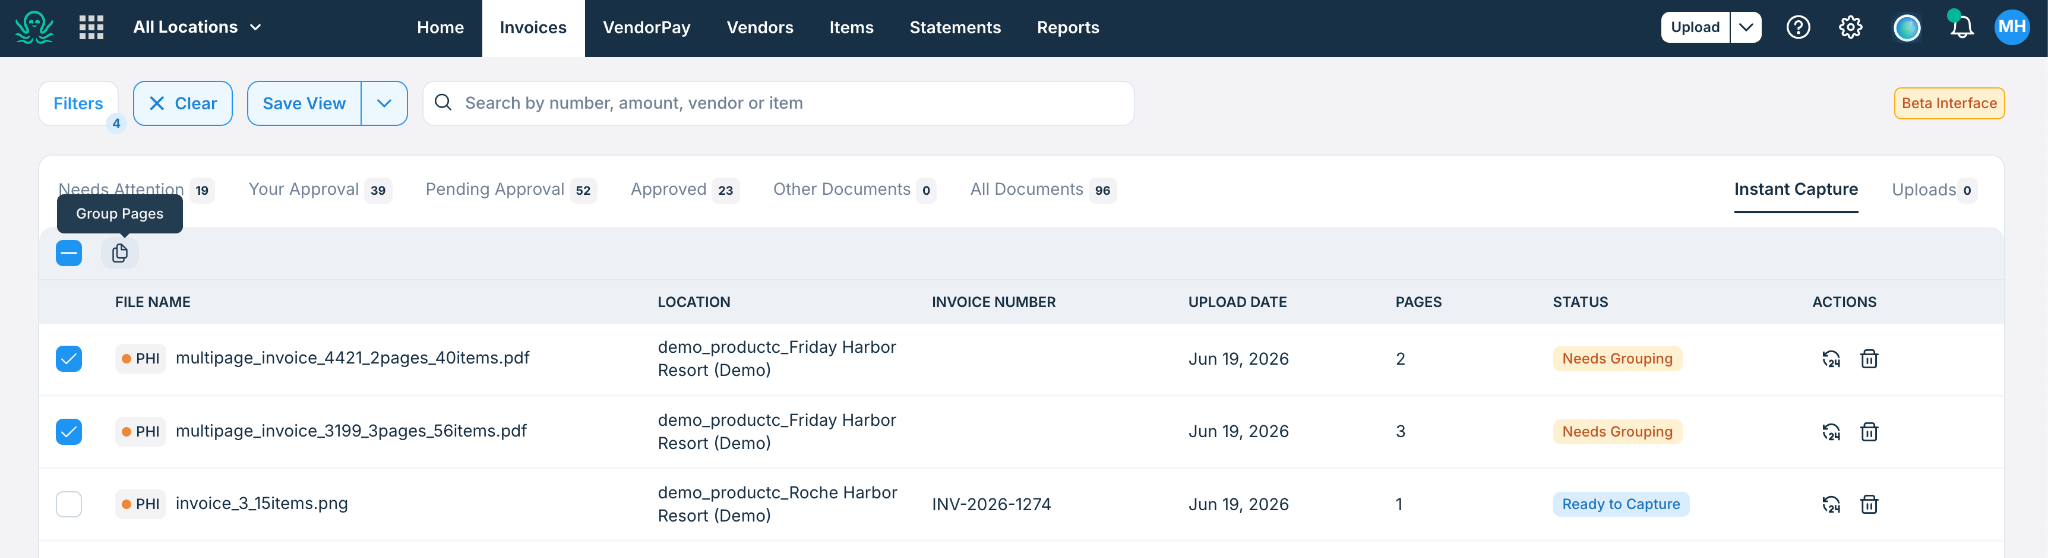
From the Instant Capture tab, select the files or pages you want to group by checking their checkboxes.
Click the Group Pages button that appears in the toolbar.
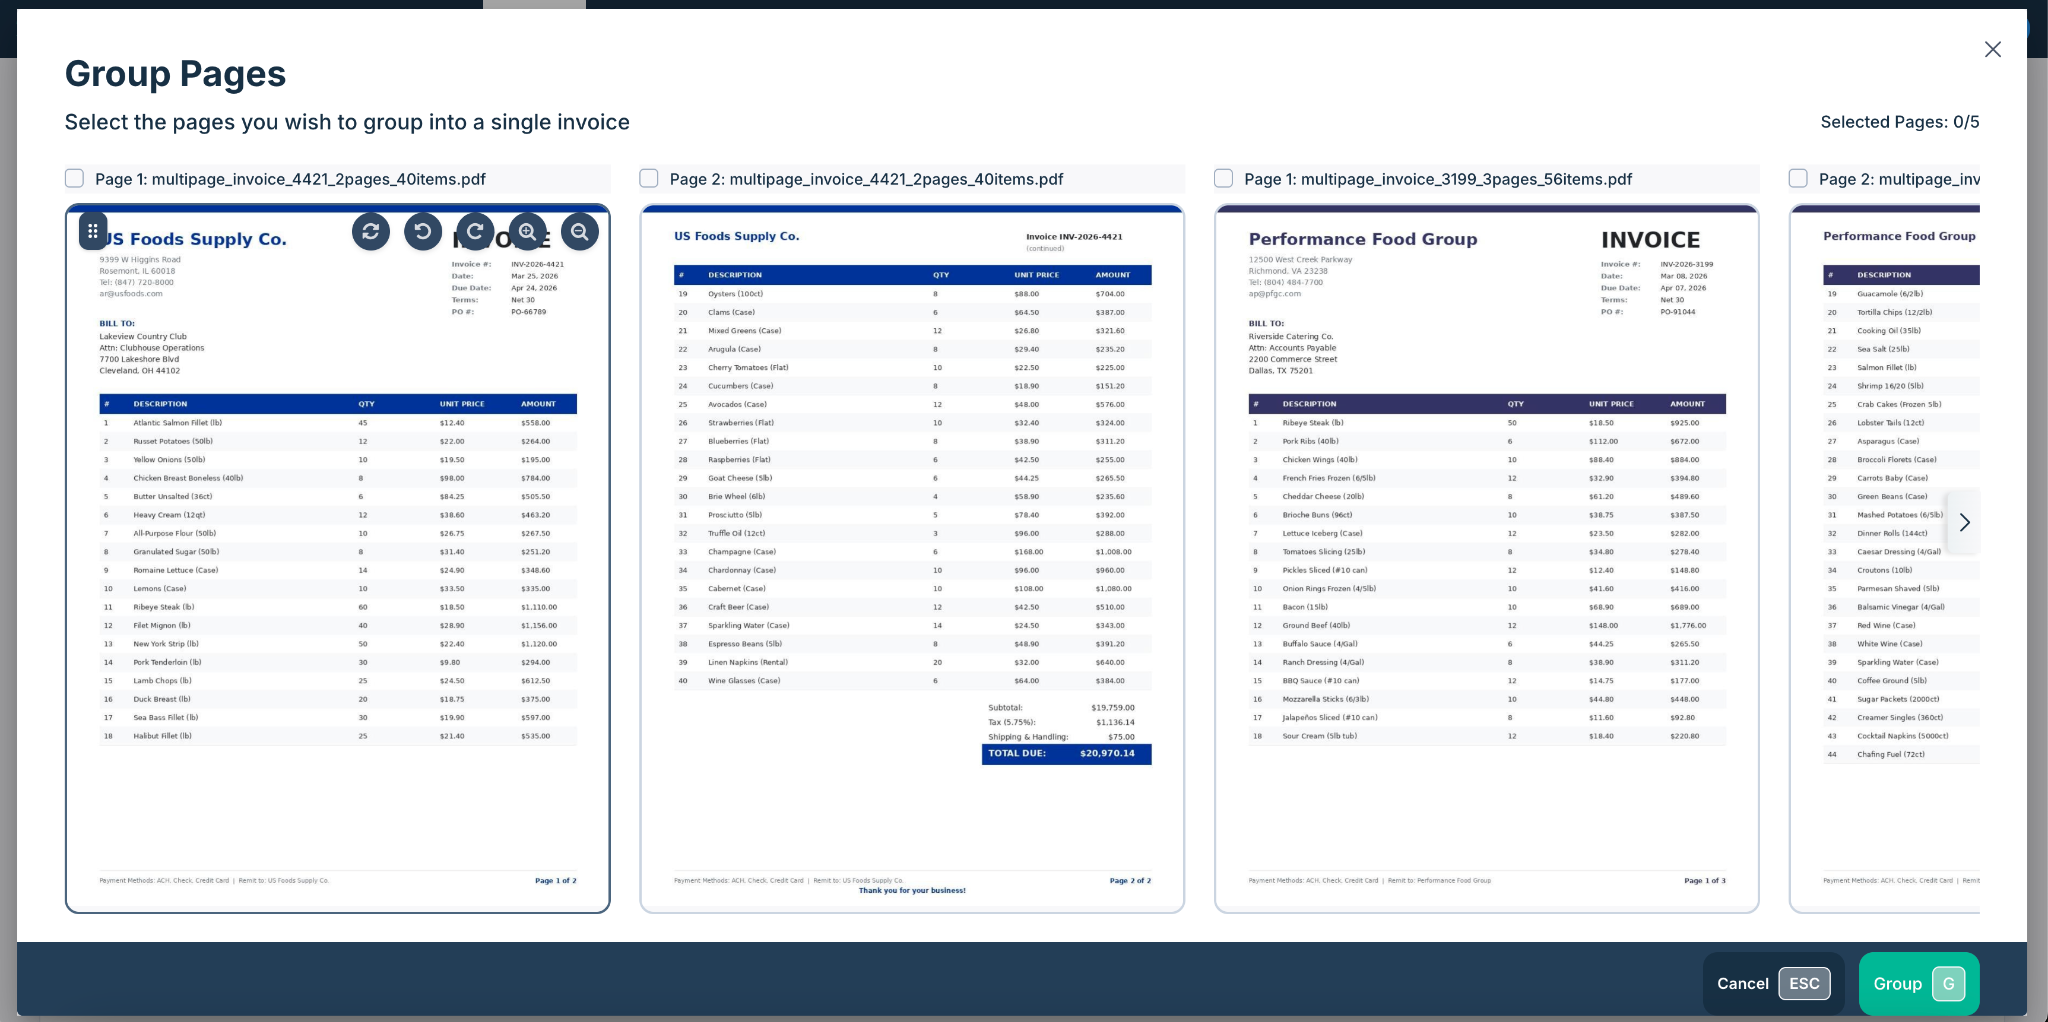
In the modal, select the specific pages that belong together (the counter shows "Selected Pages: X/Y").
Click Group (or press G) to combine them into a single invoice.
Reviewing Extracted Data
Once a file is ready, click the capture icon in the Actions column to open the review screen.
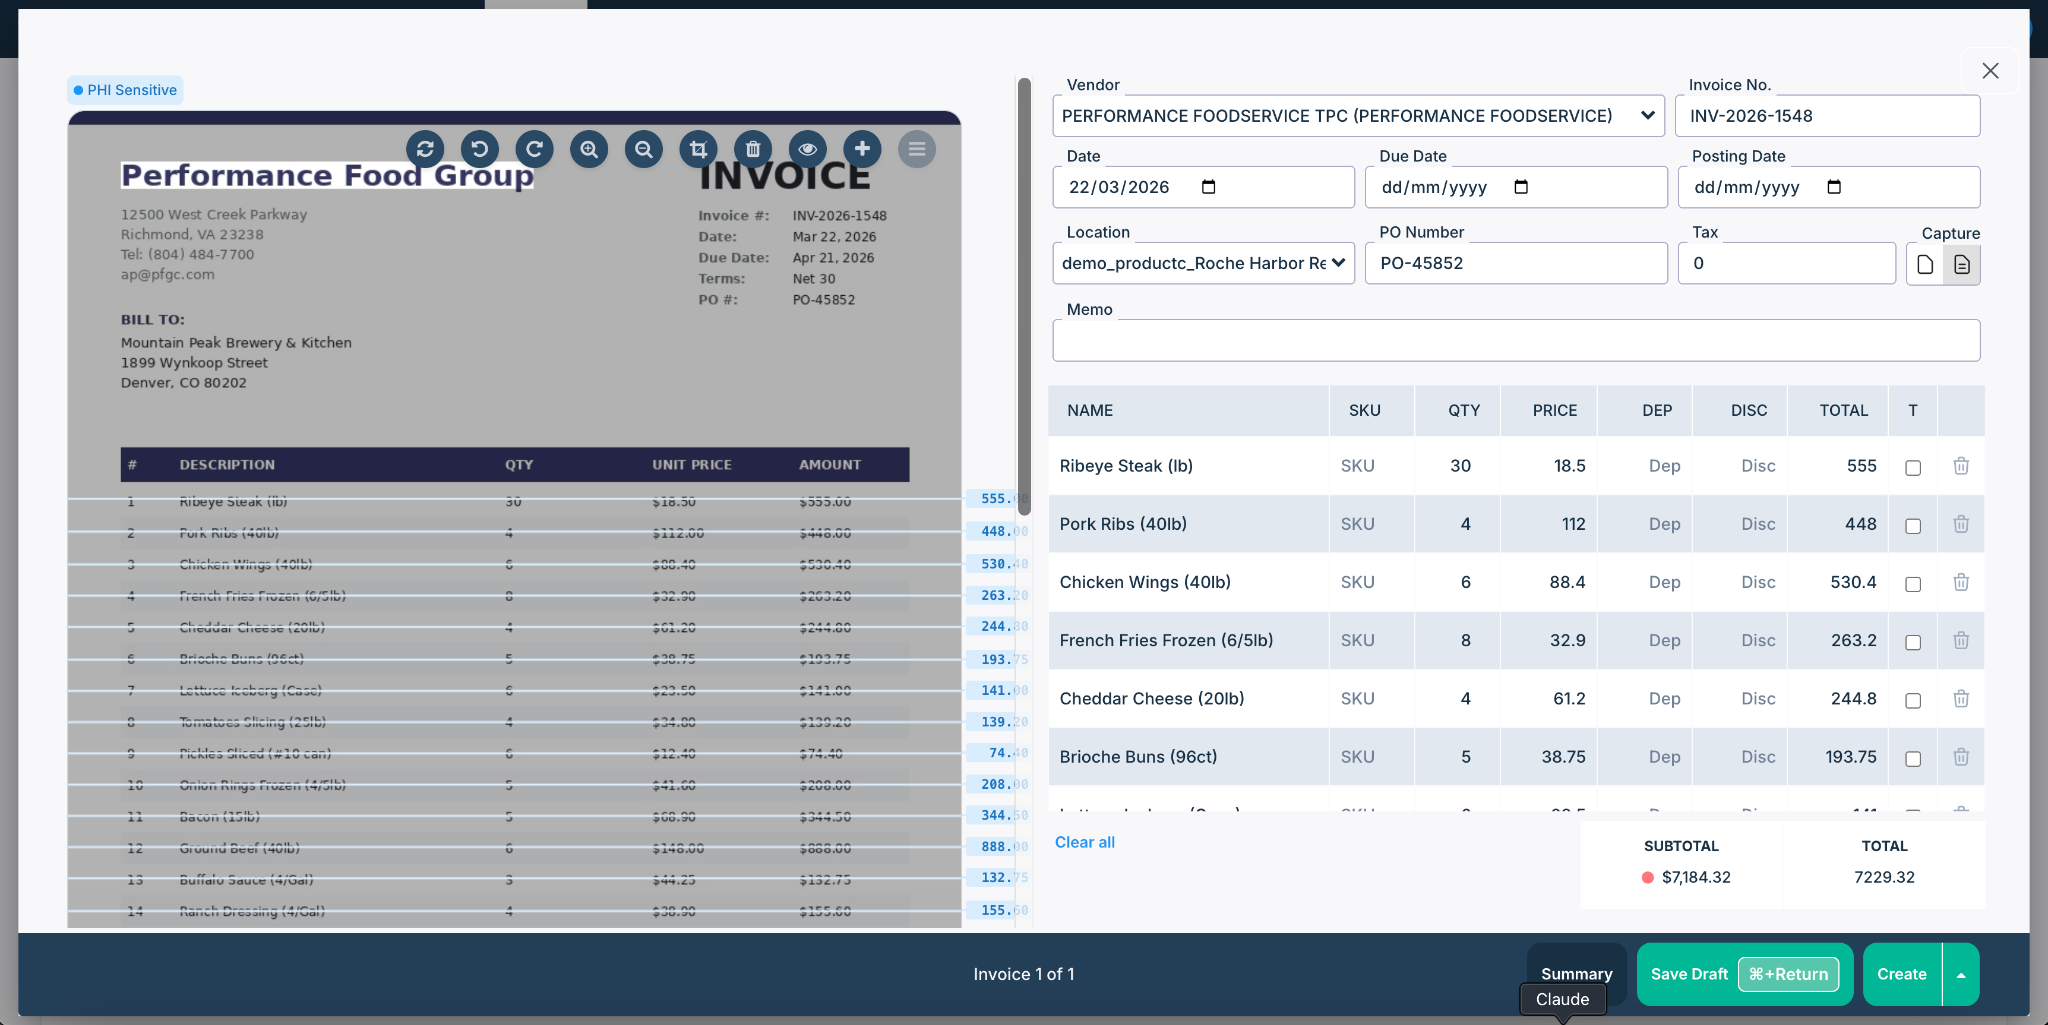
The review screen has two panels:
Invoice image: The original invoice is displayed with blue highlight boxes drawn around each captured line item. These highlights are linked to the corresponding rows in the form on the right, so you can verify each value against the source document.
Extracted data: The extracted invoice fields are shown in an editable form:
Header fields: Vendor, Invoice No., Date, Due Date, Posting Date, Location, PO Number, Tax, Memo
Line items table: Each row shows NAME, SKU, QTY, PRICE, DEP (deposit), DISC (discount), TOTAL, and a taxable (T) checkbox
As you correct fields:
Related fields update automatically (e.g., correcting a vendor may update GL suggestions)
Coding selections are saved and auto-applied to future invoices from the same vendor
Understanding Confidence Indicators
Instant Capture uses visual indicators to flag fields that need attention:
Tip: Instant Capture can reliably process approximately 30–50 line items per page. For invoices with significantly more items on a single page, standard processing may be more accurate.
Once you've reviewed the extracted data and resolved any red indicators, you can:
Create and Open (recommended for most users)
Click the dropdown arrow (▾) next to the Create button and select Create and Open. This creates the invoice and immediately opens it for you without driving you to the Summary screen.
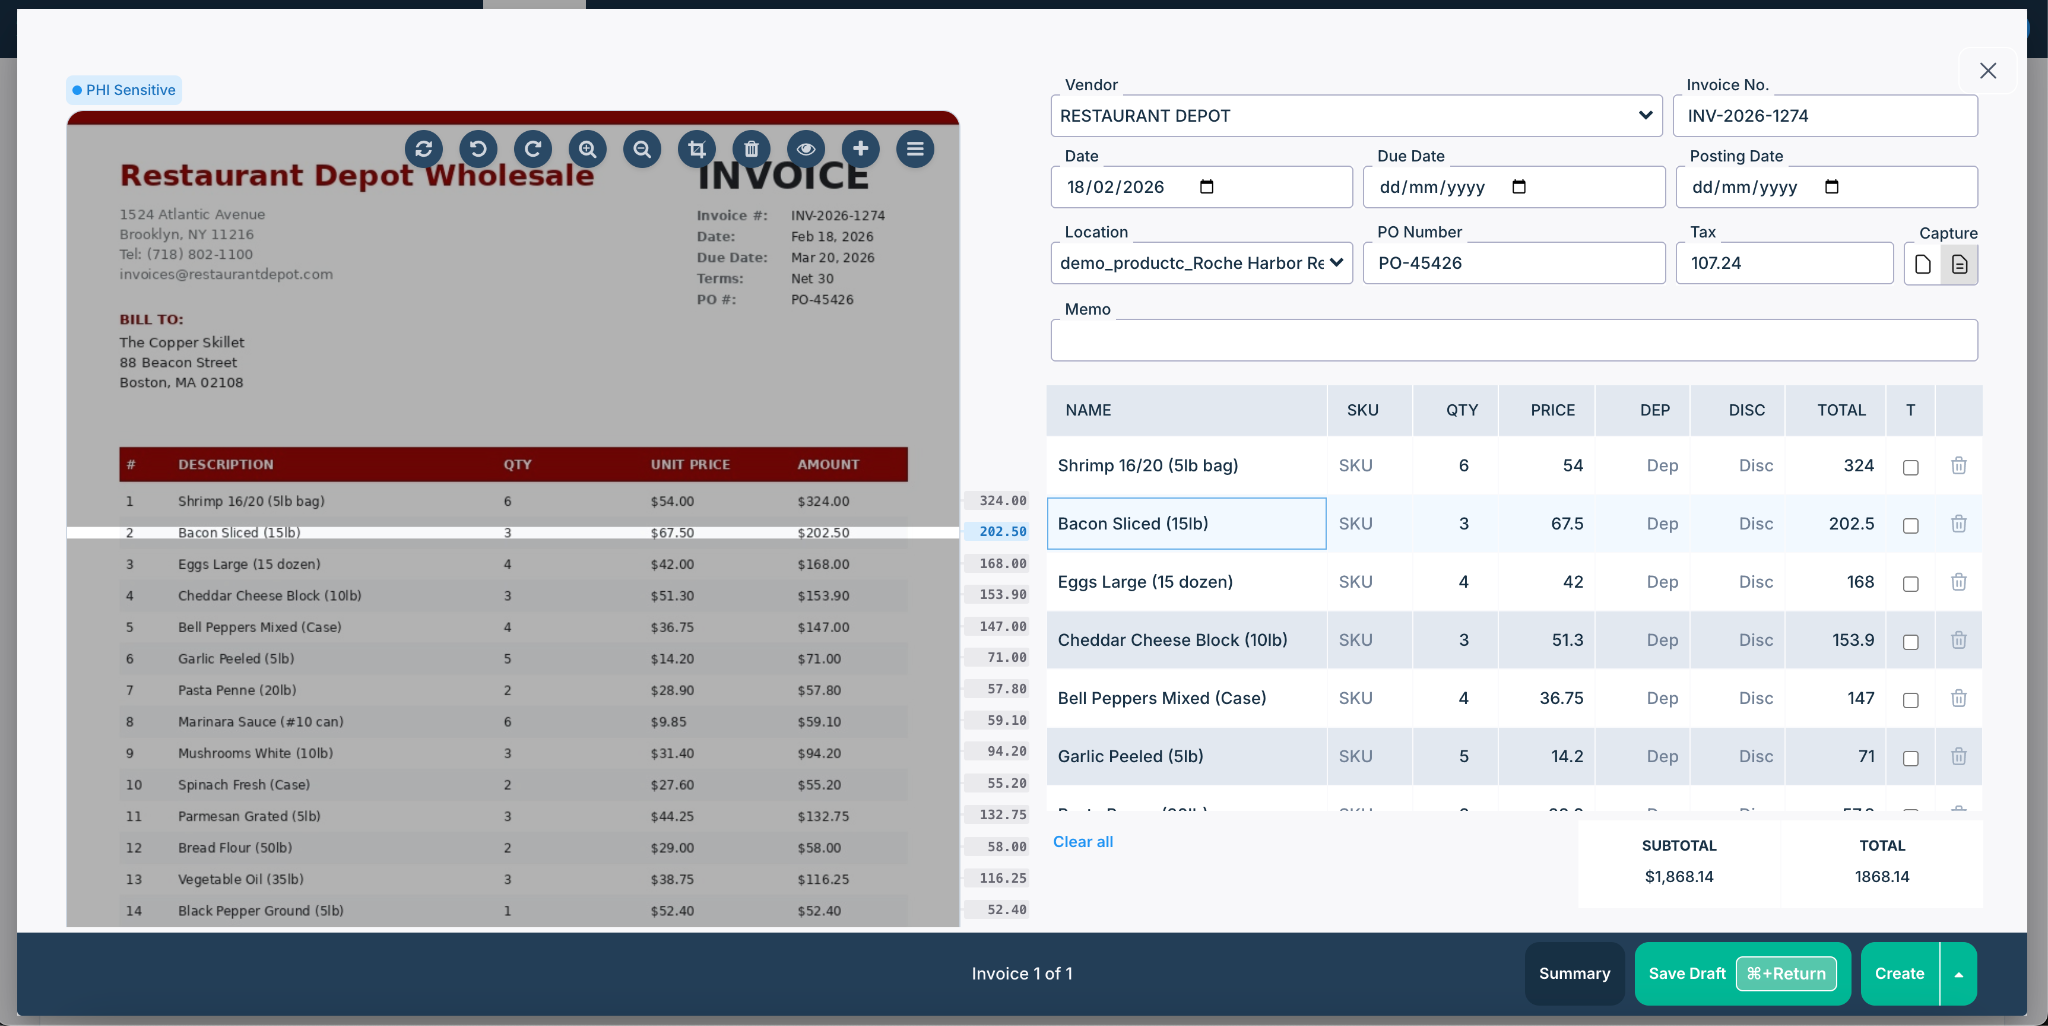
Review Summary first
Click Summary at the bottom of the screen to see a final overview of all invoices in the batch before creating them. Then click Create to finalize. This is useful when processing multiple invoices in a single session and you want to review everything at once before committing.
You can also click Save Draft (⌘+Return) at any point to save your progress and return to the review screen later.
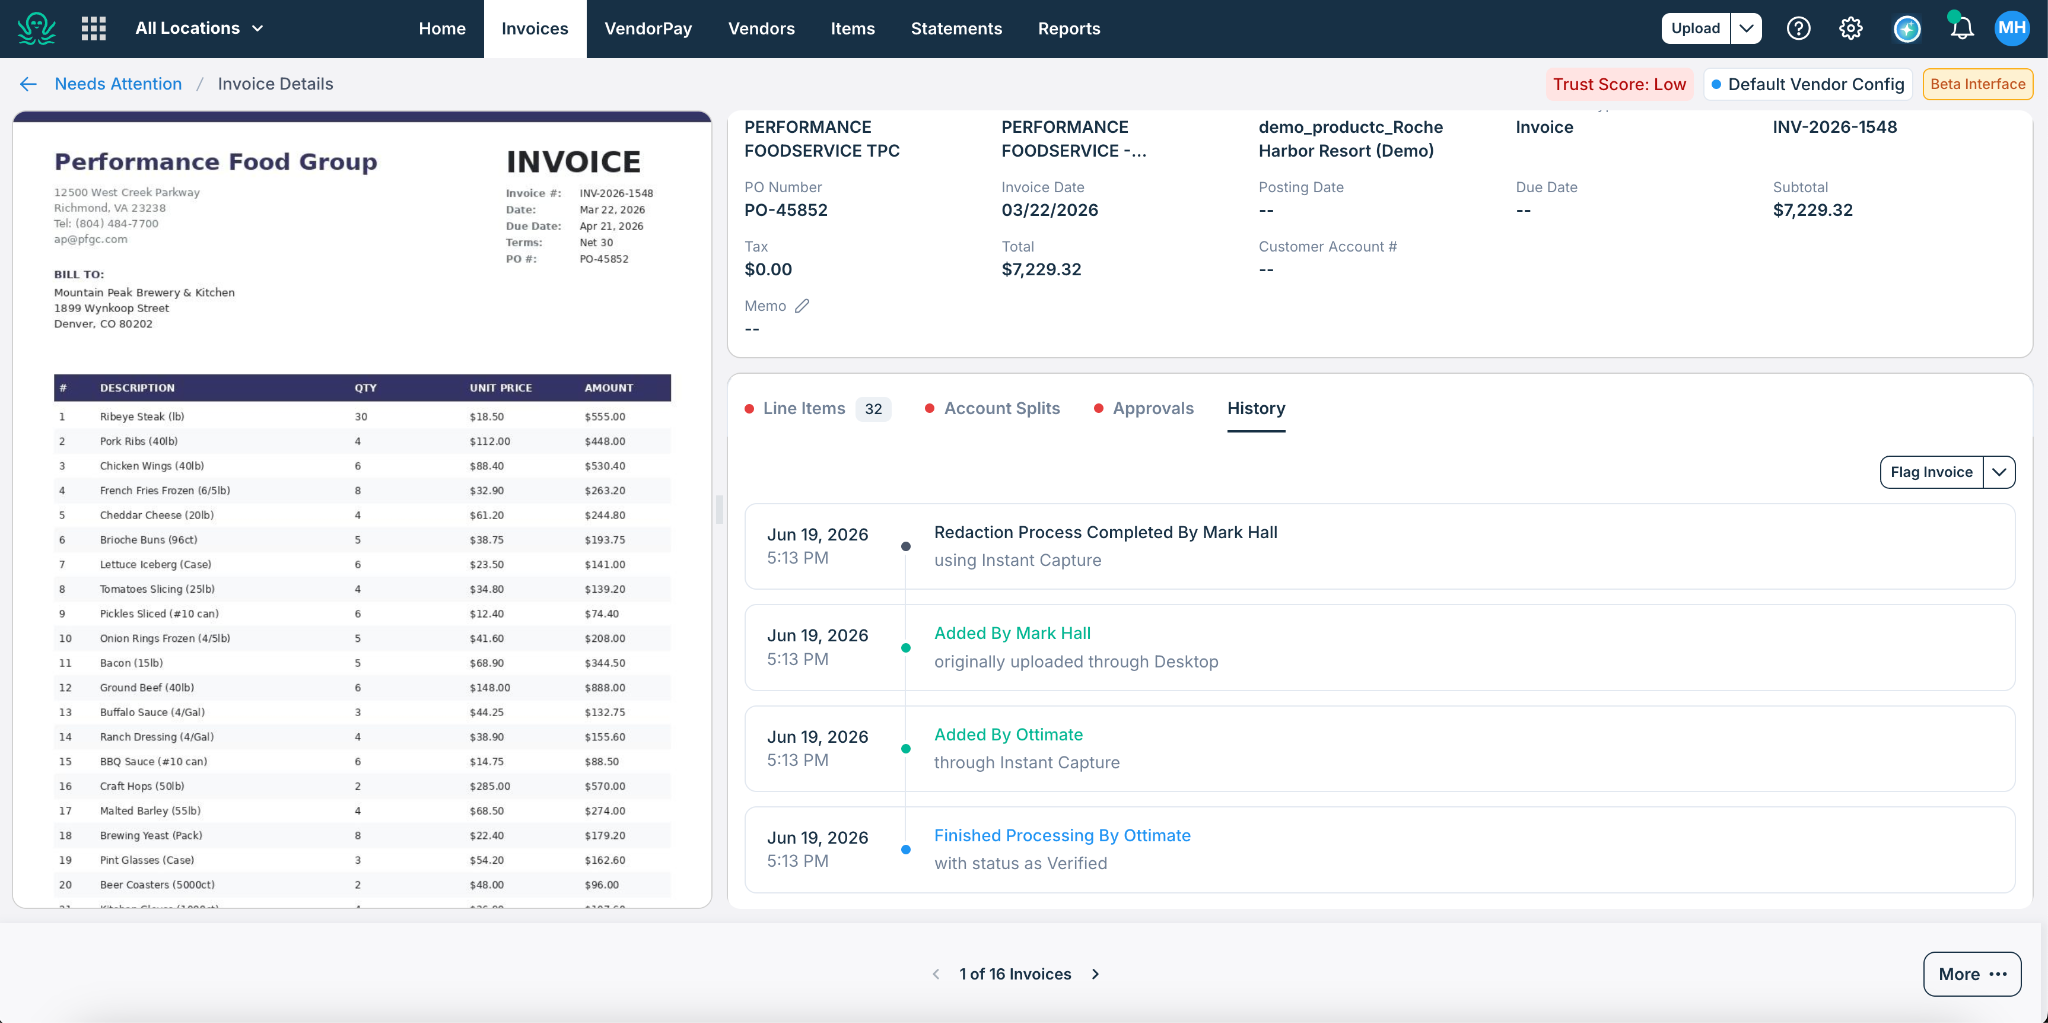
Once created, the invoice appears in your Ottimate invoice list. You can view its processing history — including who uploaded it and when it was processed through Instant Capture — in the History tab of the invoice details.
Was this article helpful?
That’s Great!
Thank you for your feedback
Sorry! We couldn't be helpful
Thank you for your feedback
Feedback sent
We appreciate your effort and will try to fix the article