We've made setup faster and easier
We've refreshed how you set up your business and bank account in Ottimate. Here's what's different and what to expect the next time you go through setup.
You can reuse the same controller and owner information across your businesses—you only need to enter your details once without having to re-enter them for every additional business. You can save your progress and finish later. Businesses and bank accounts are now managed separately, so you can set up a business first and add its bank account whenever you're ready.
If you pay vendors in Canada, you can now enable Canada Pay directly during setup.
Setting Up a Business
Here's what the process looks like now:
Go to Account Administration from the app menu, and select Businesses.
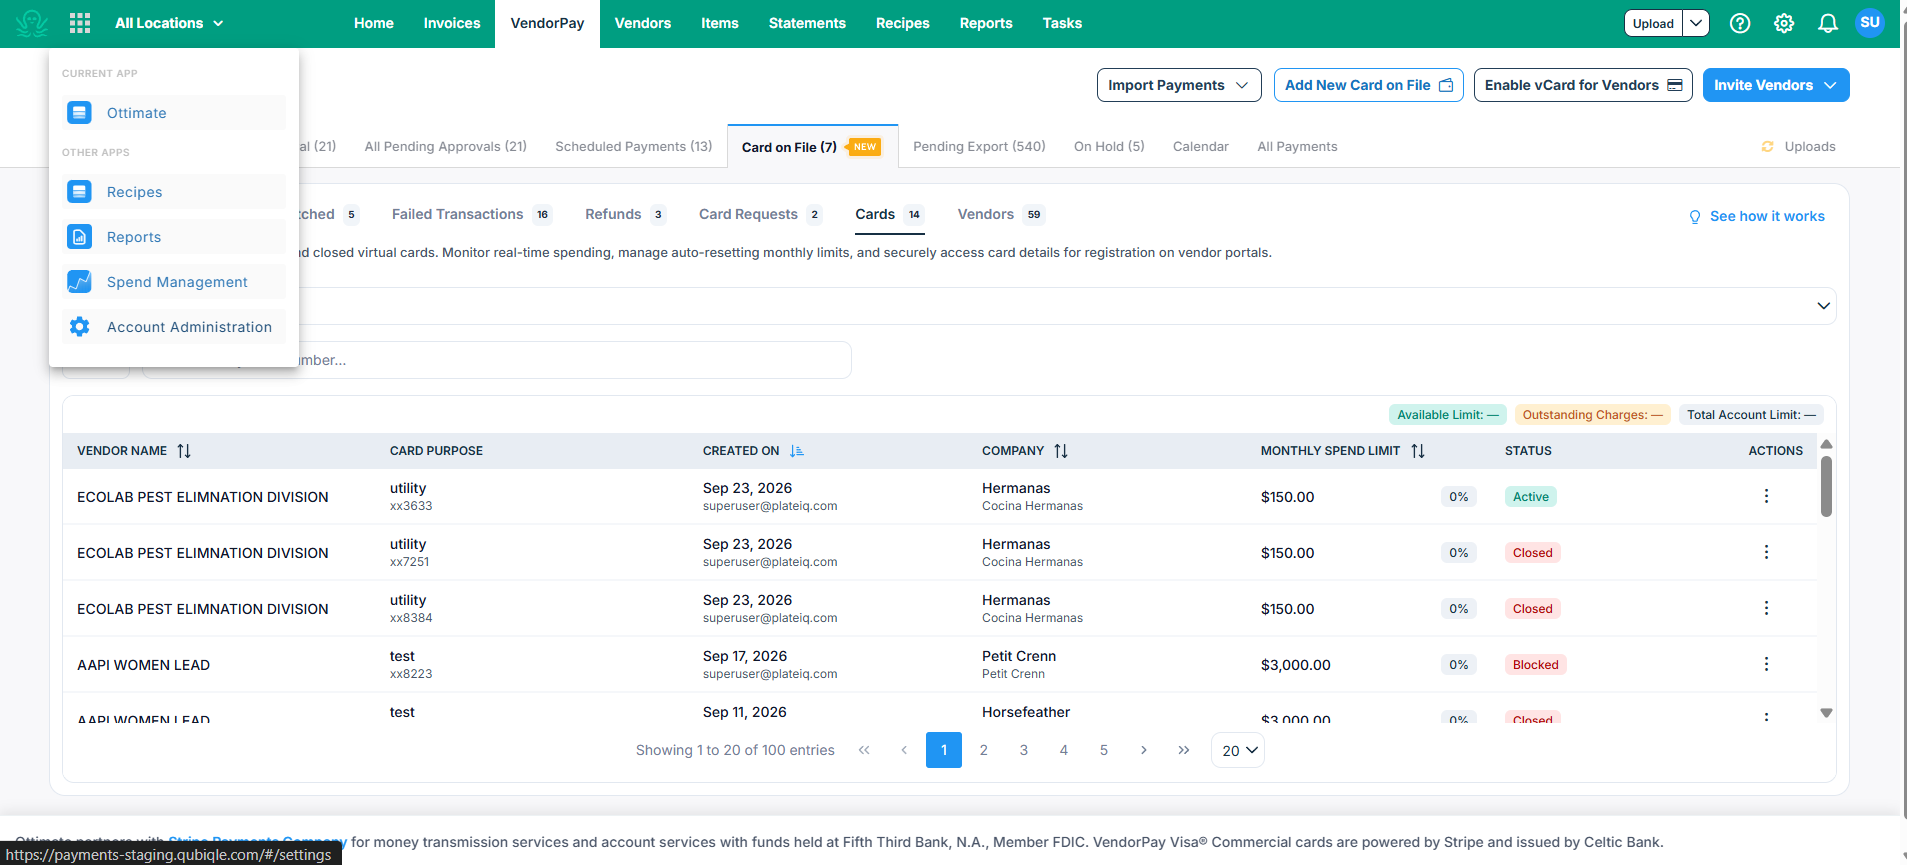
Account Administration, from the app menu
Choose Add New Business and select Let's Go to begin.
Confirm your password, then set up (or confirm) two-factor authentication for extra account security.
Select your entity type — Business or Individual.
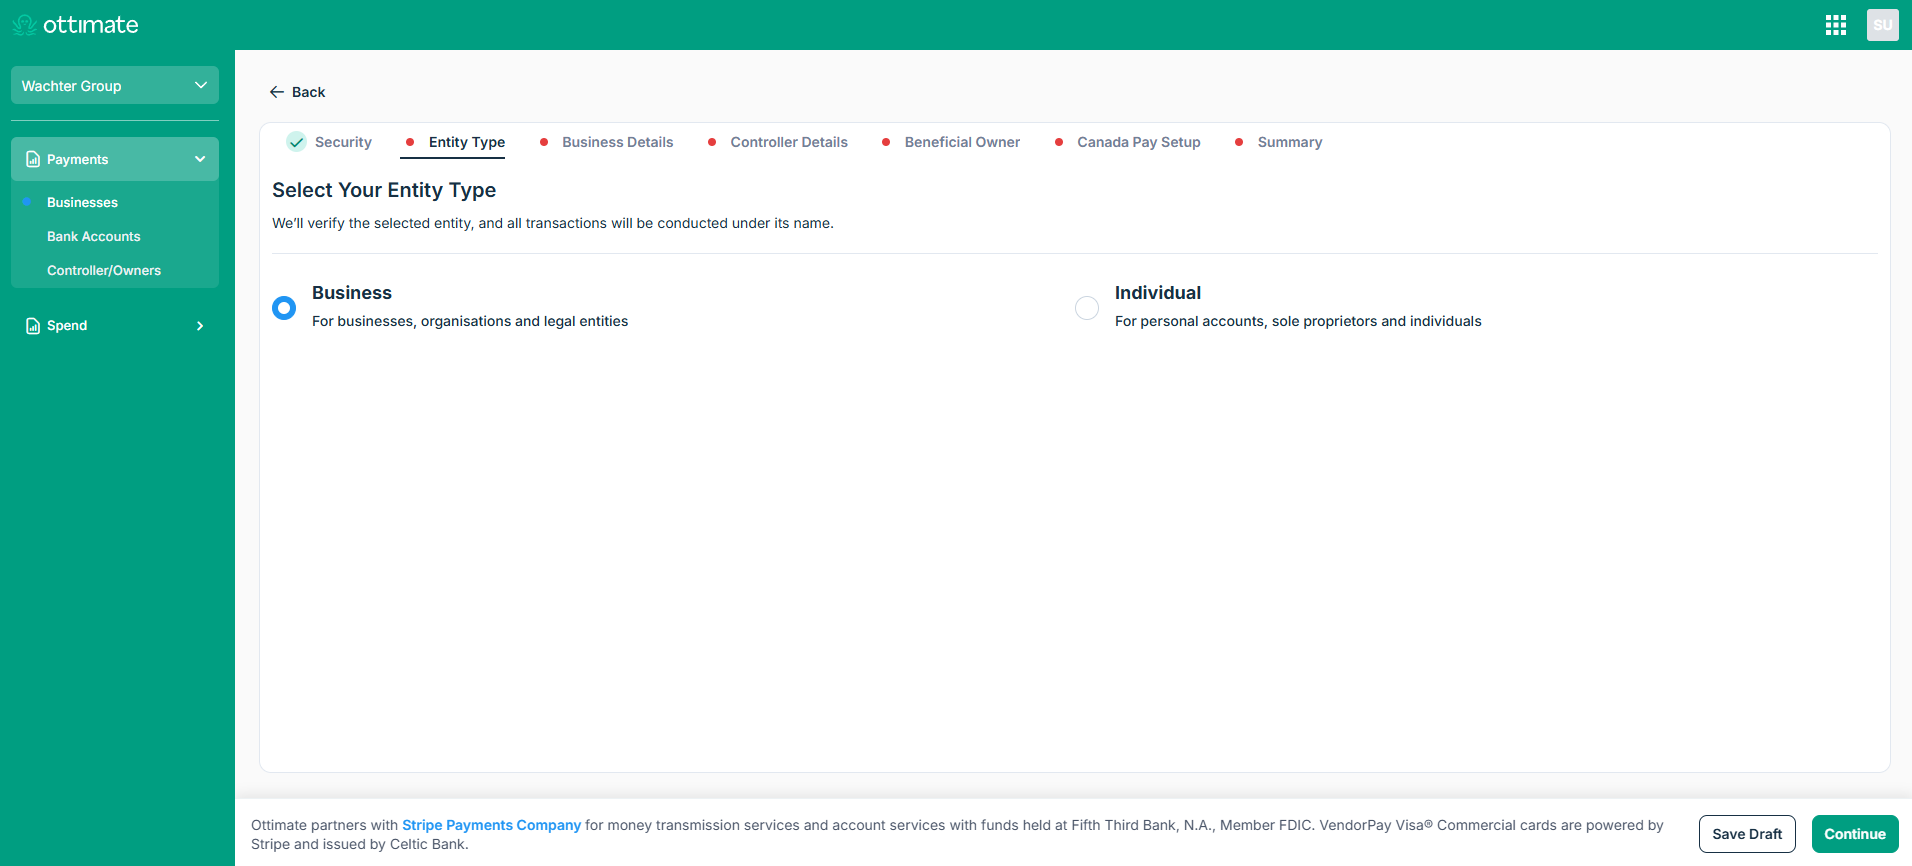
Selecting your entity type
Enter your business details, such as your legal name, EIN, and address.
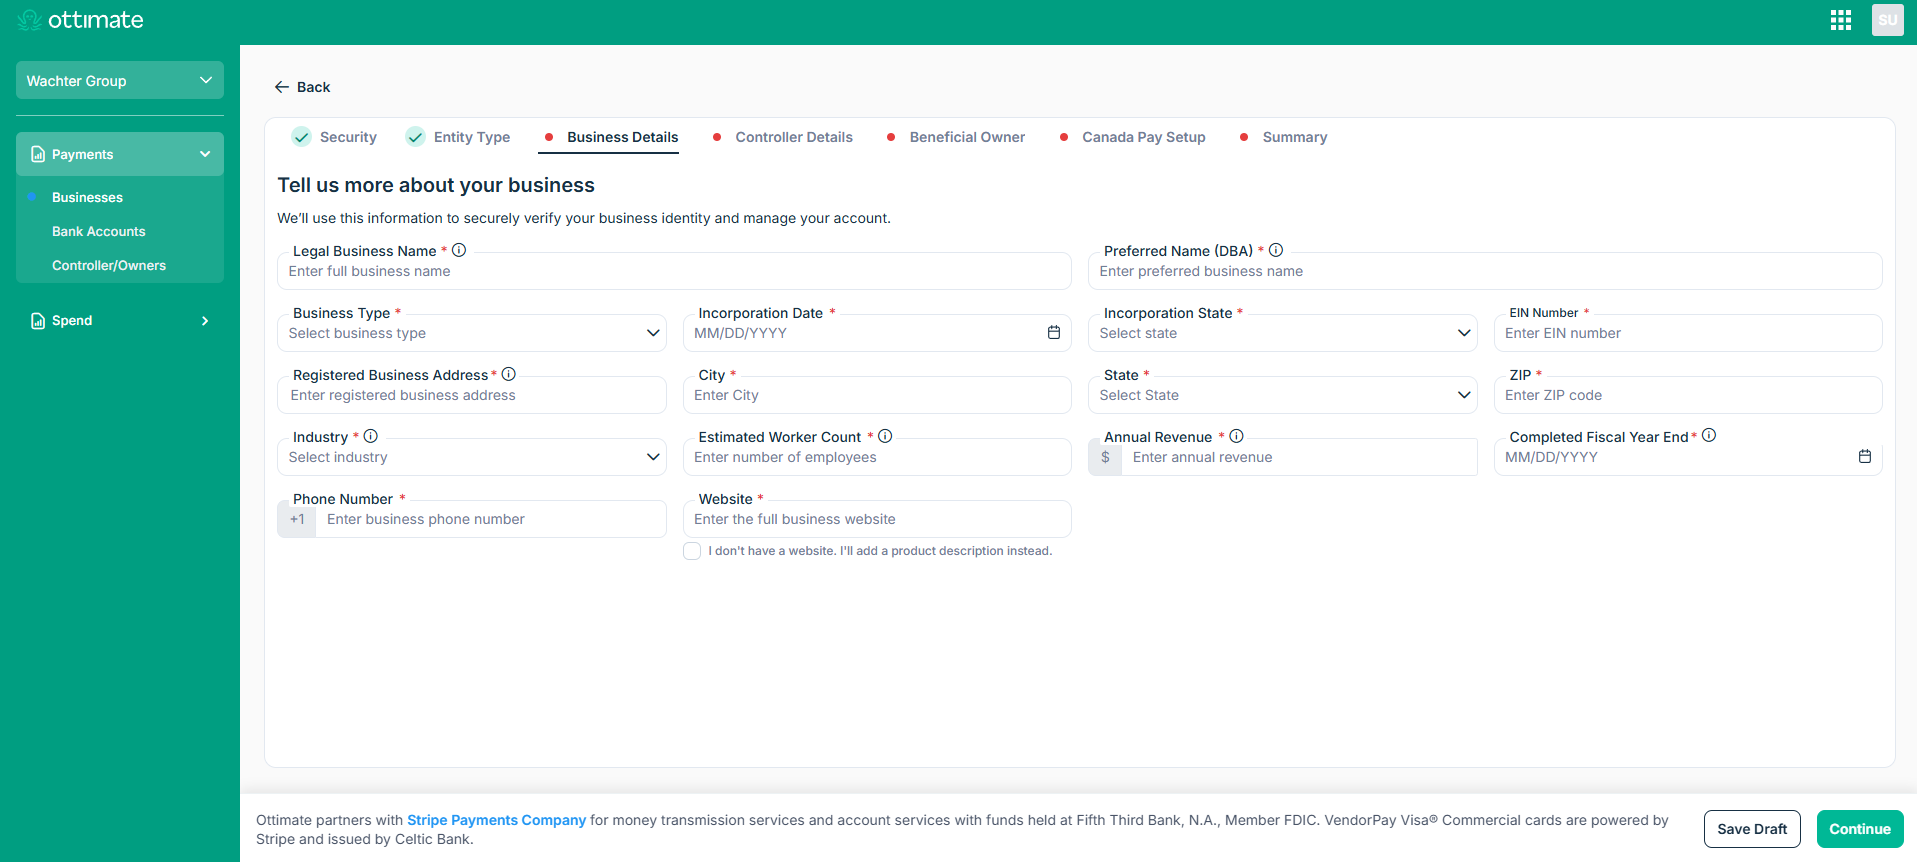
Entering your business details
Enter the details of your controller — the key executive authorized to manage your finances.
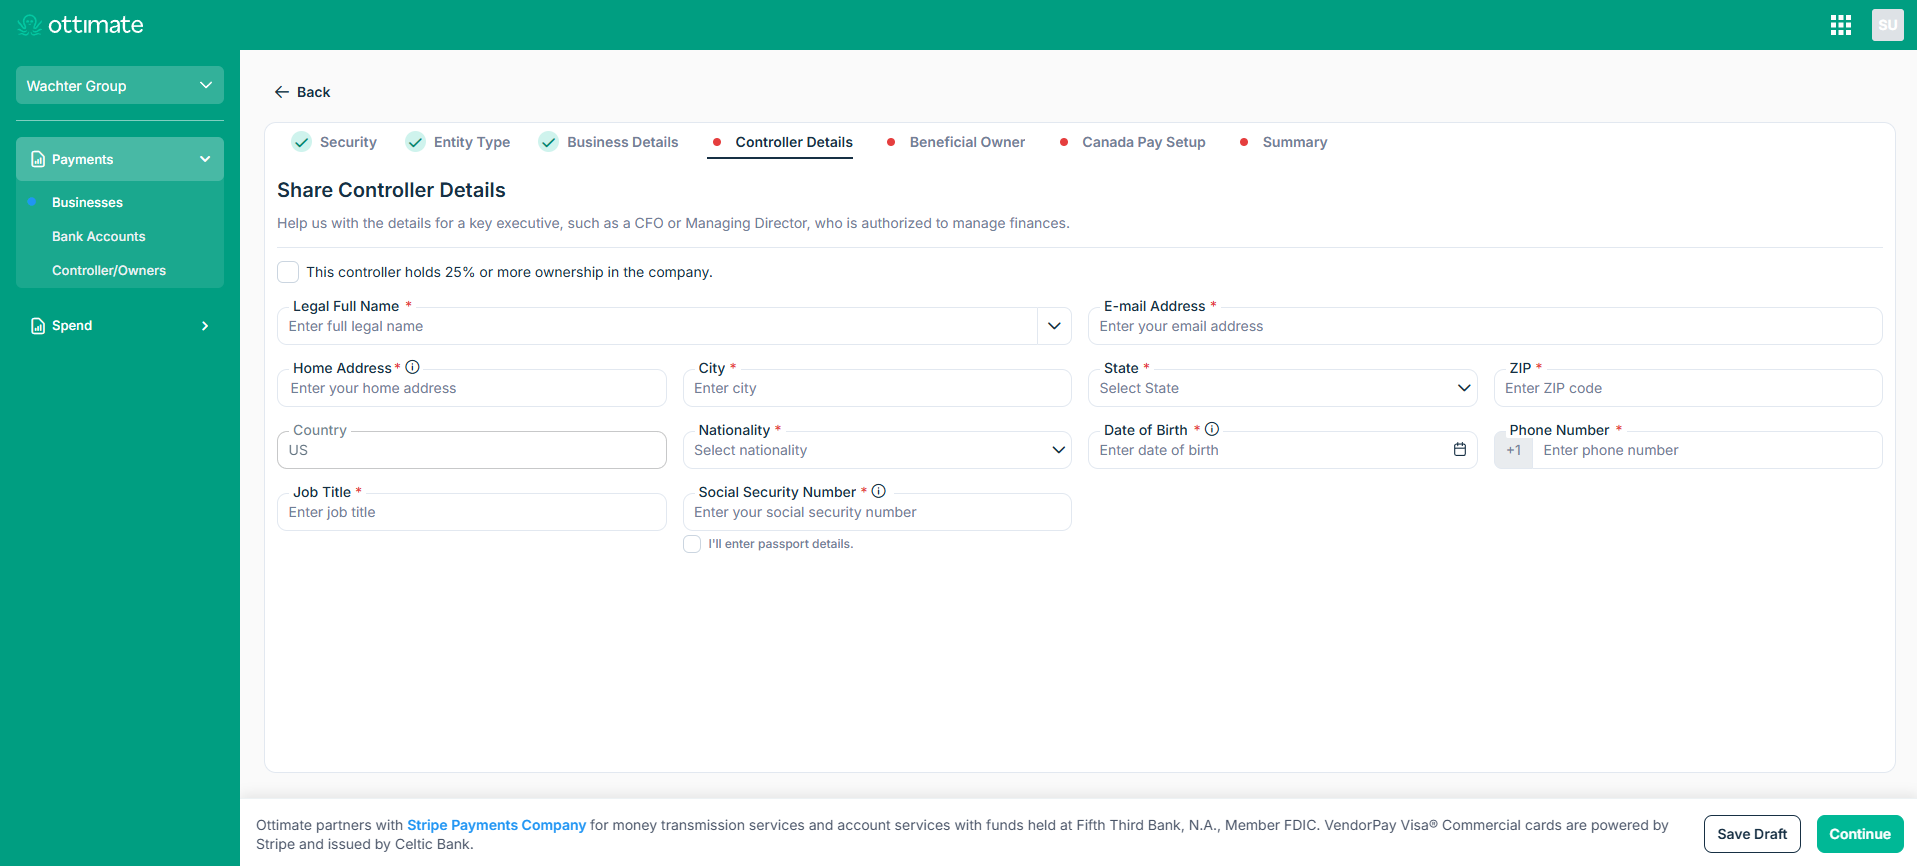
Entering controller details
If anyone owns 25% or more of the company, add their details as a beneficial owner. If not, select the “There are no individuals owning more than 25% of the company, I want to skip this step” checkbox.
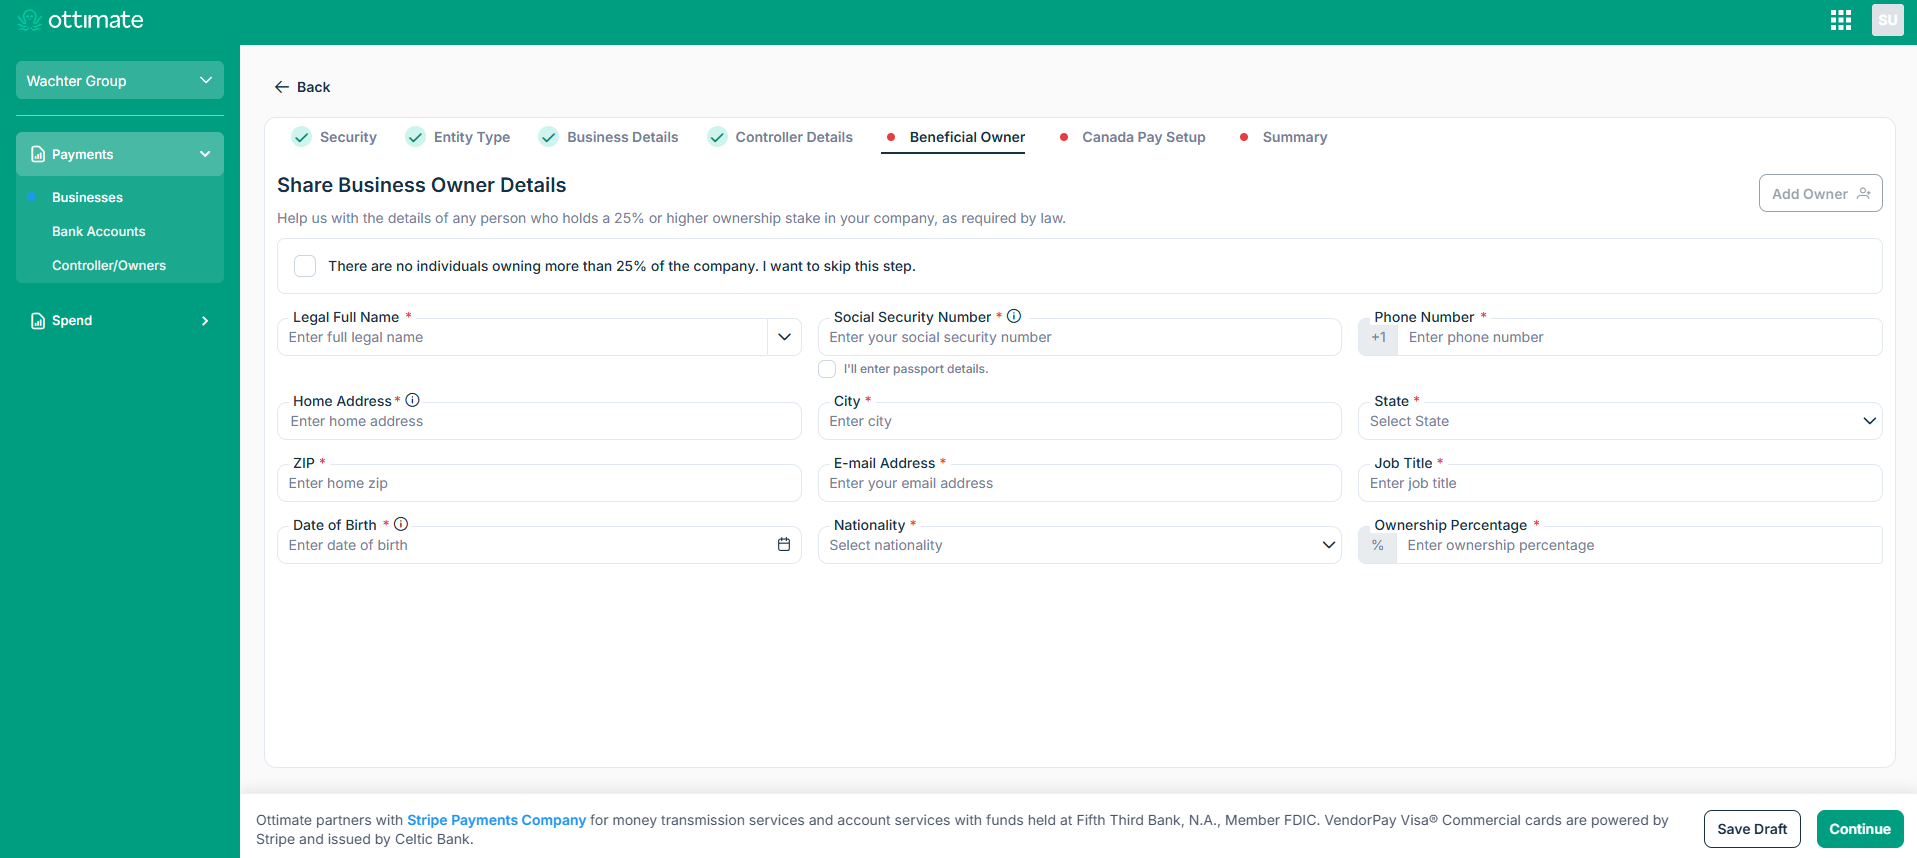
Adding beneficial owner details, if applicable
If you pay Canadian vendors, you can enable Canada Pay here, or skip it for now.
Review your information and select Verify to submit.
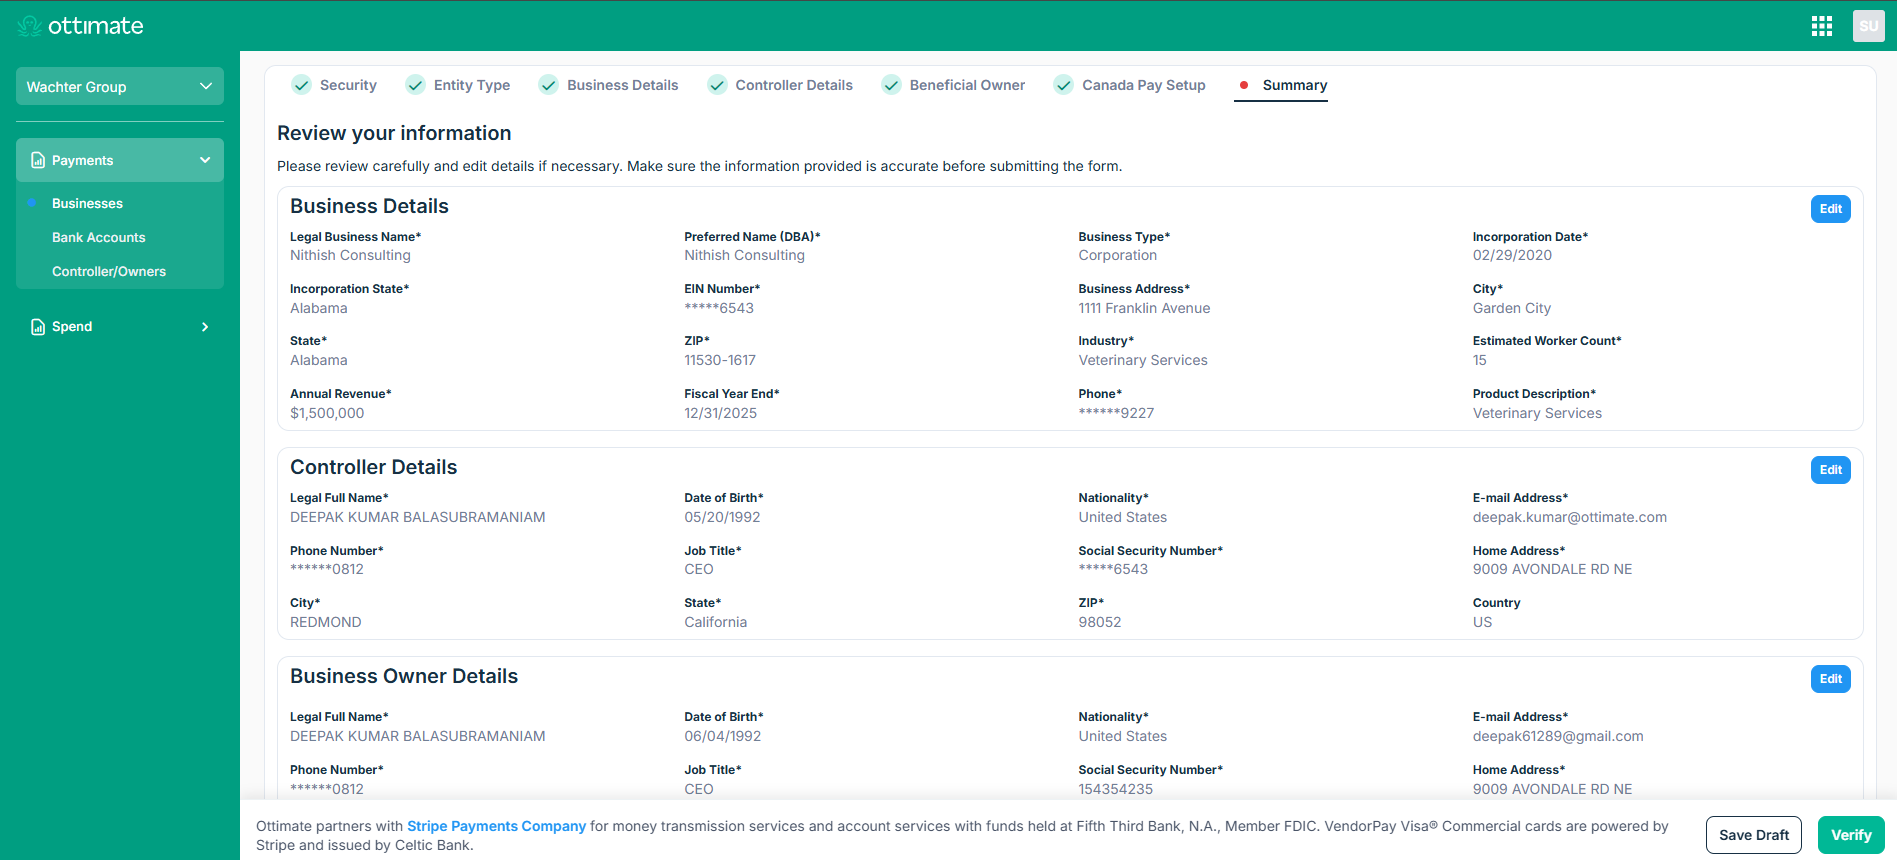
Reviewing and submitting your business information
Setting Up a Bank Account
Bank account setup is now a standalone process that connects directly to your previously configured businesses :
Navigate to Account Administration and select Bank Accounts, then Add Bank Account.
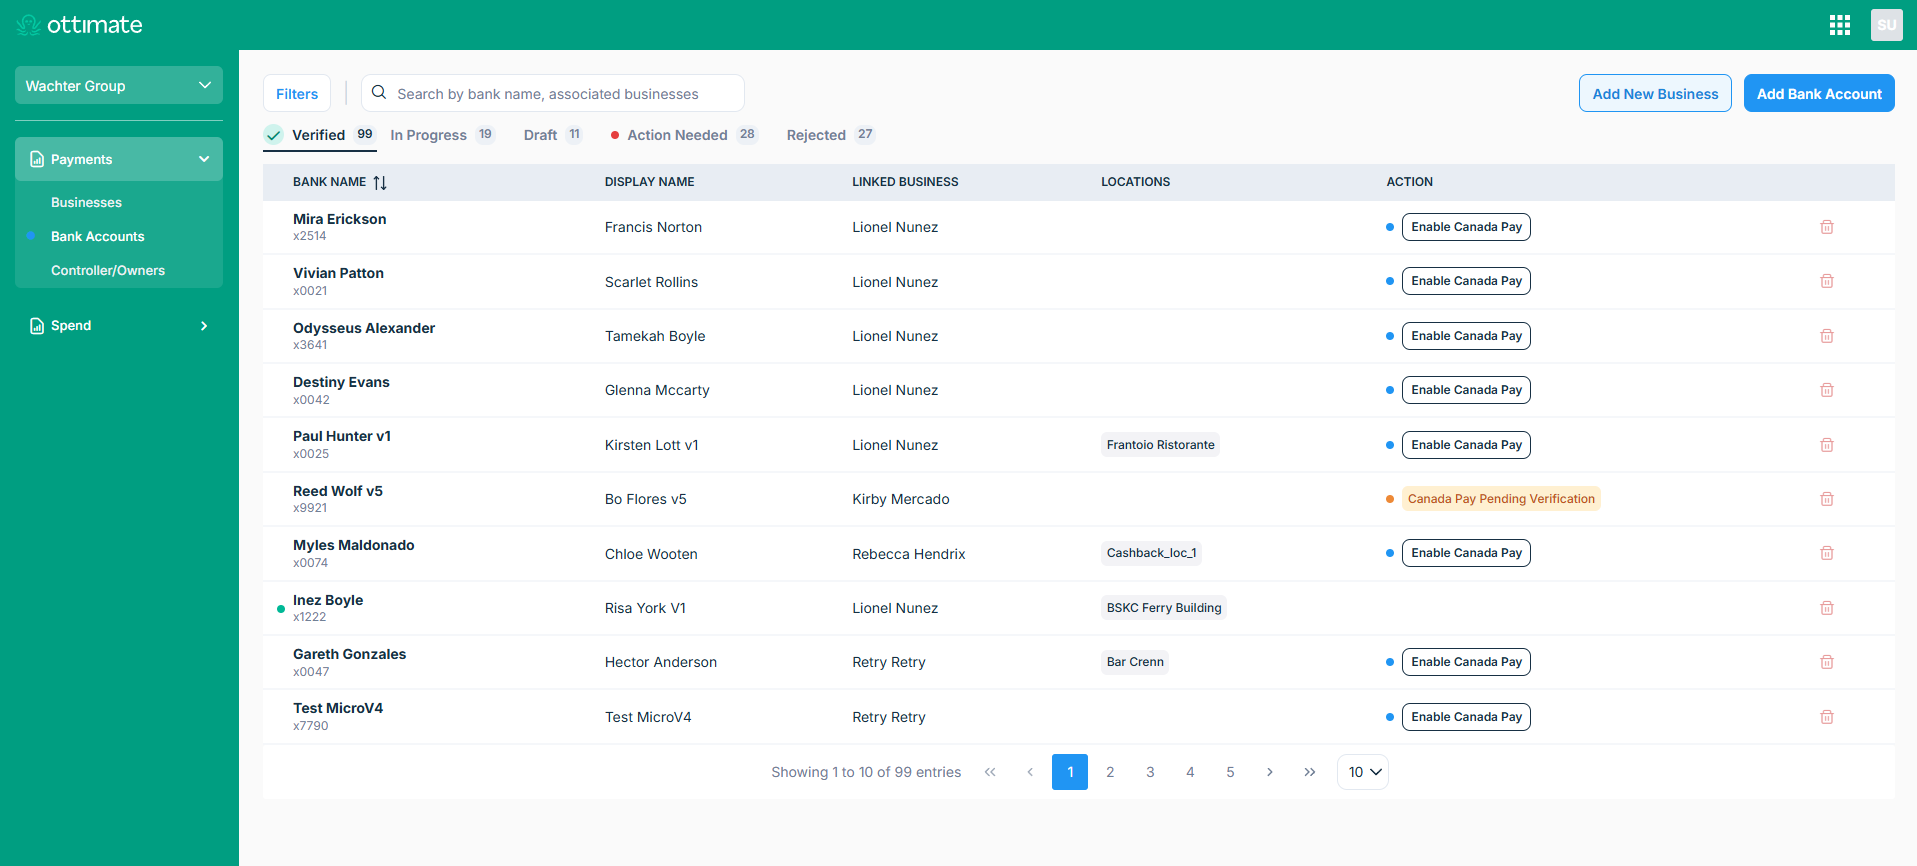
Bank Accounts dashboard — Add Bank Account
Select Let's Go to begin.
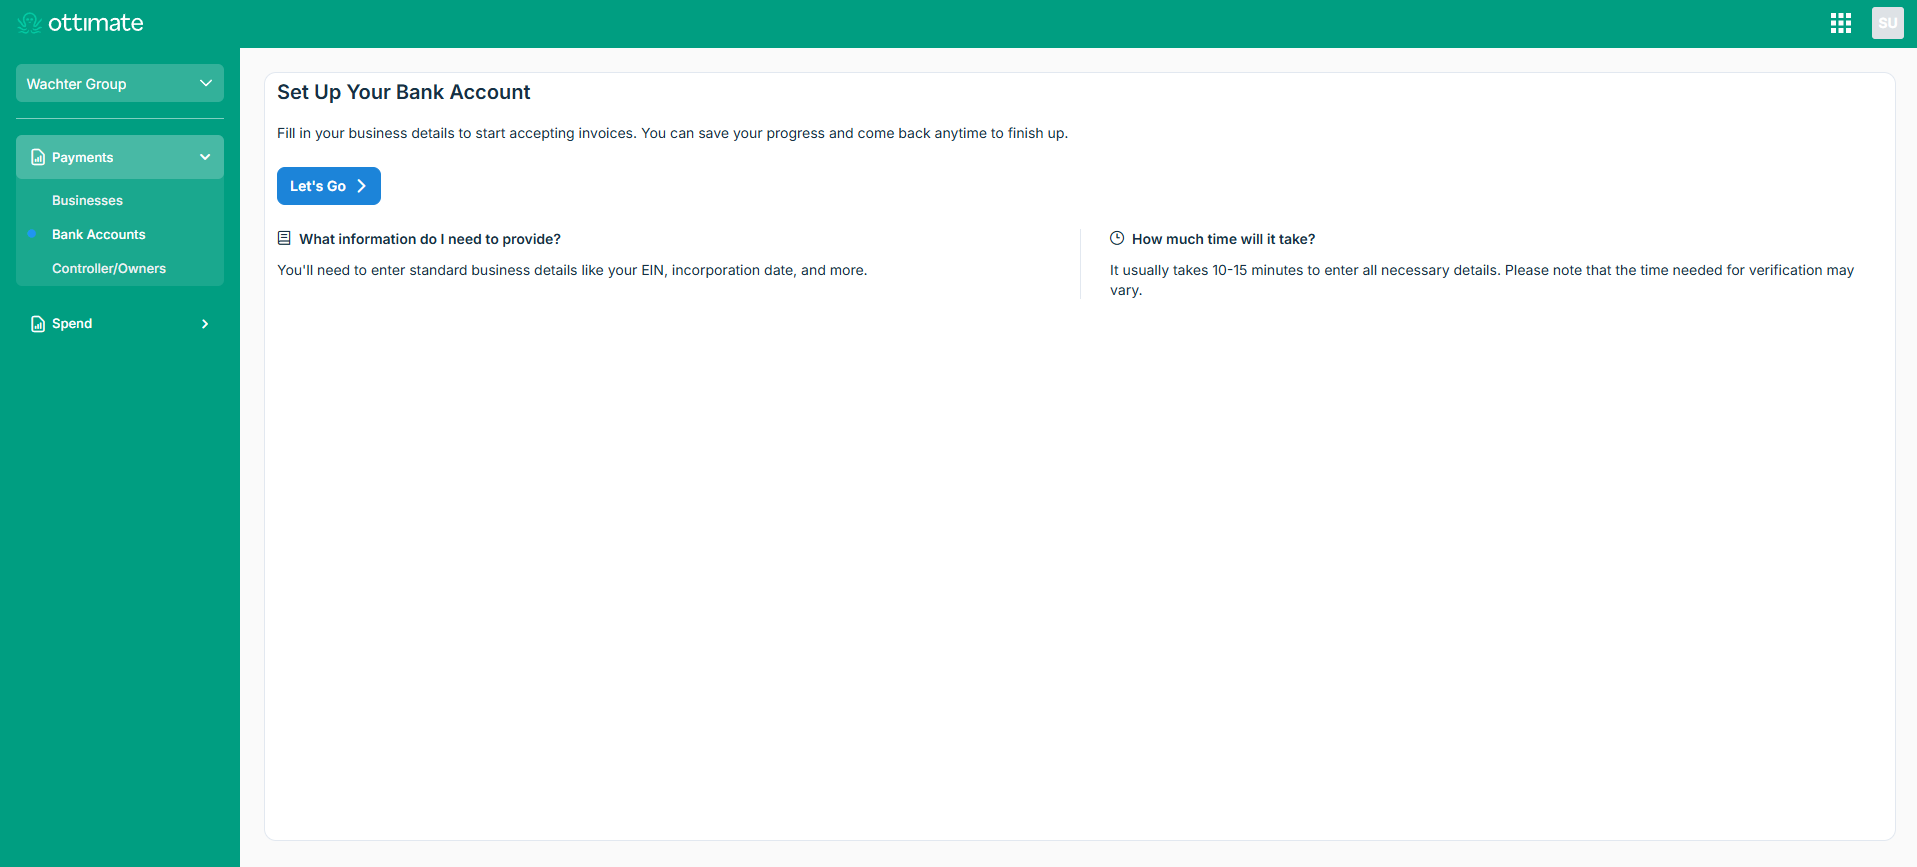
Getting started with bank account setup
Confirm your password and account security settings.
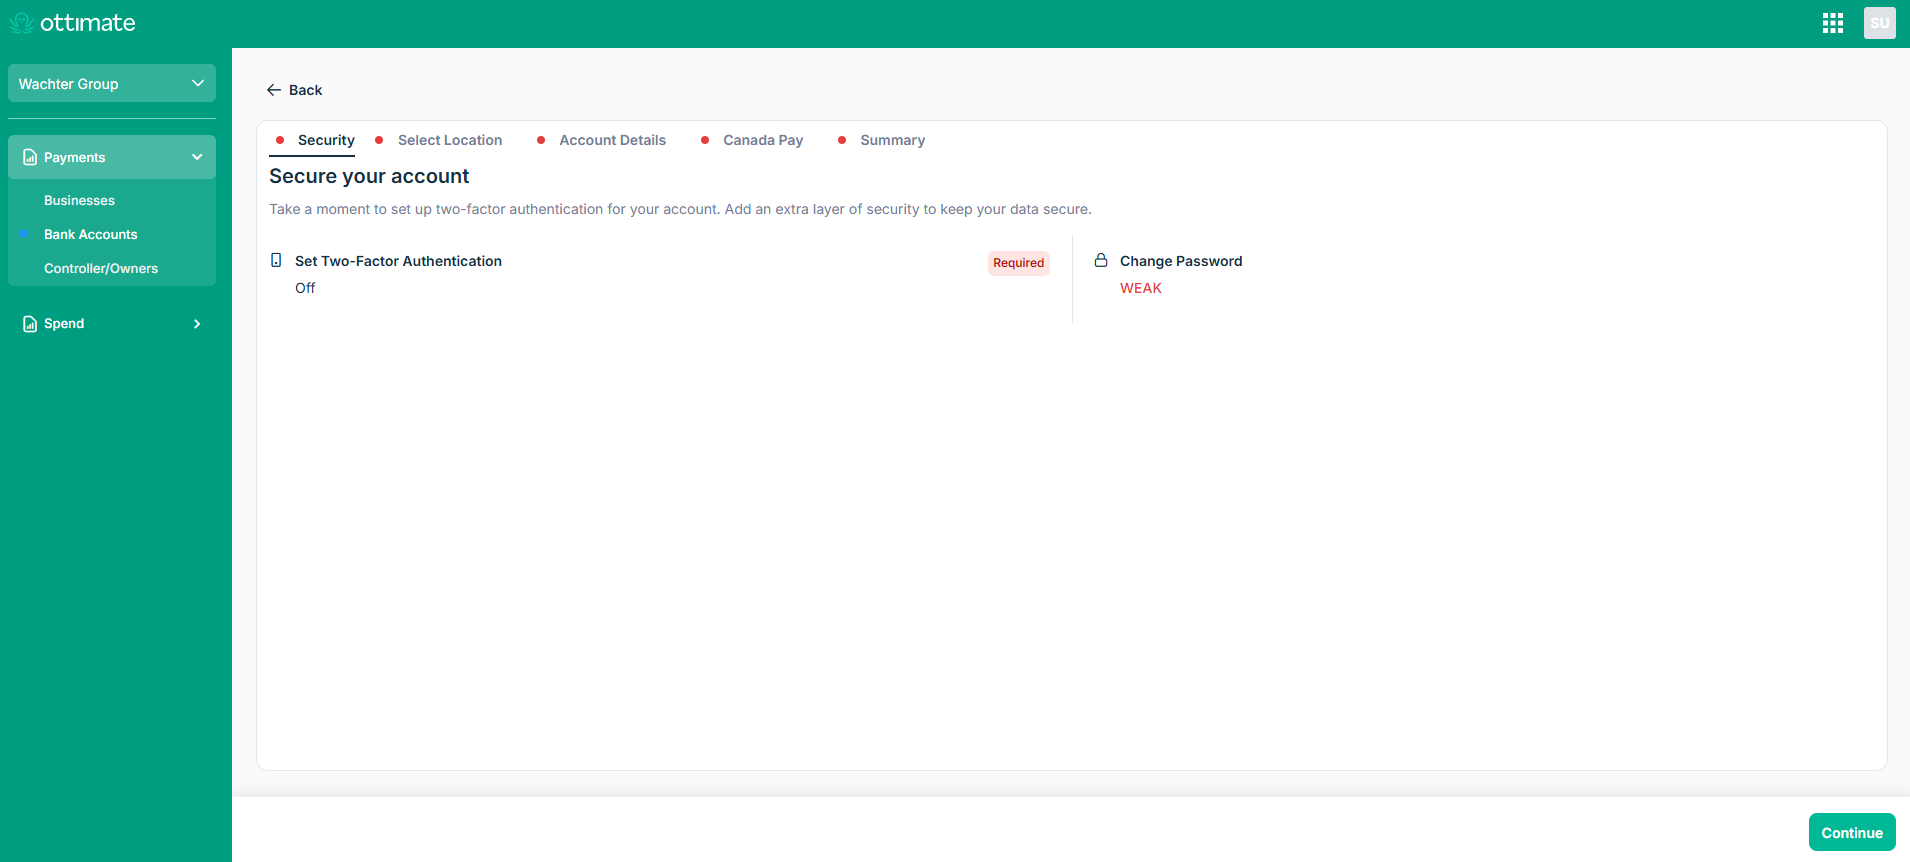
Confirming your security settings
Select the business (mandatory) — and select the company and location — you'd like this bank account tied to.
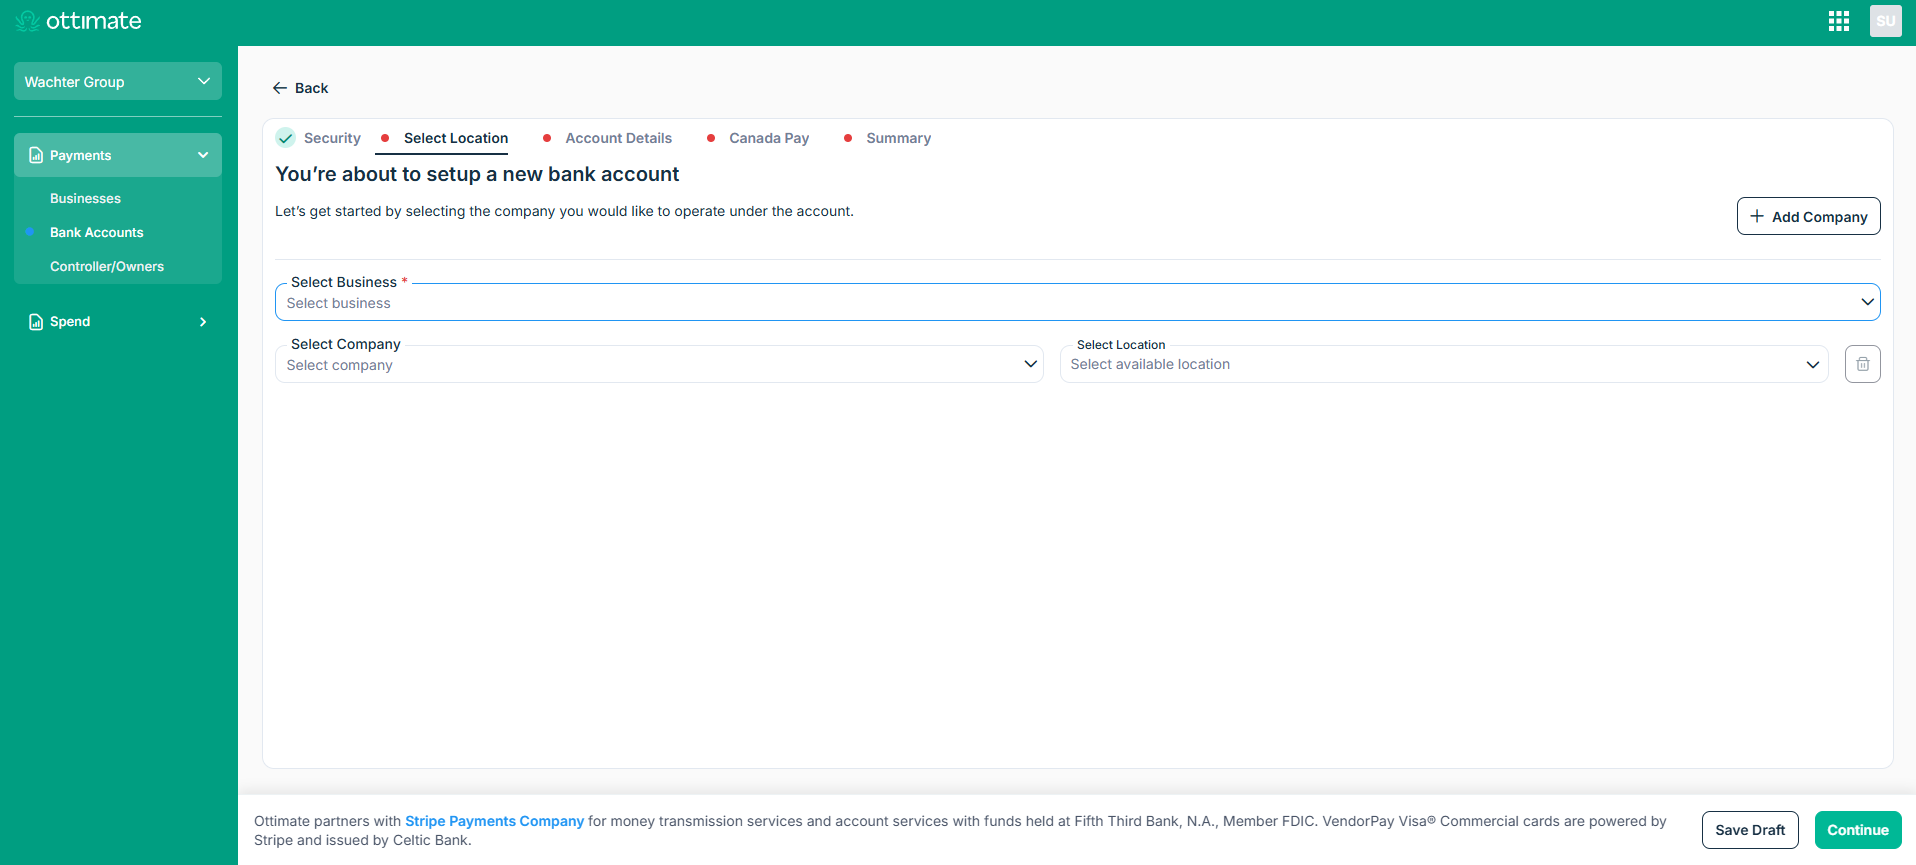
Selecting the business, company, and location
Enter your bank details, including routing and account numbers, and add the signature that should be printed on checks
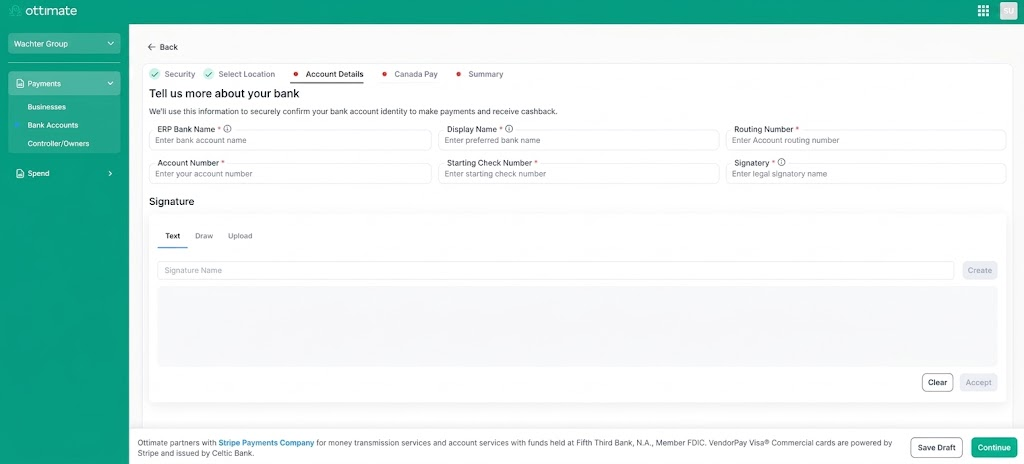
Entering your bank account details
If you pay Canadian vendors, you can enable Canada Pay here, or skip it for now.
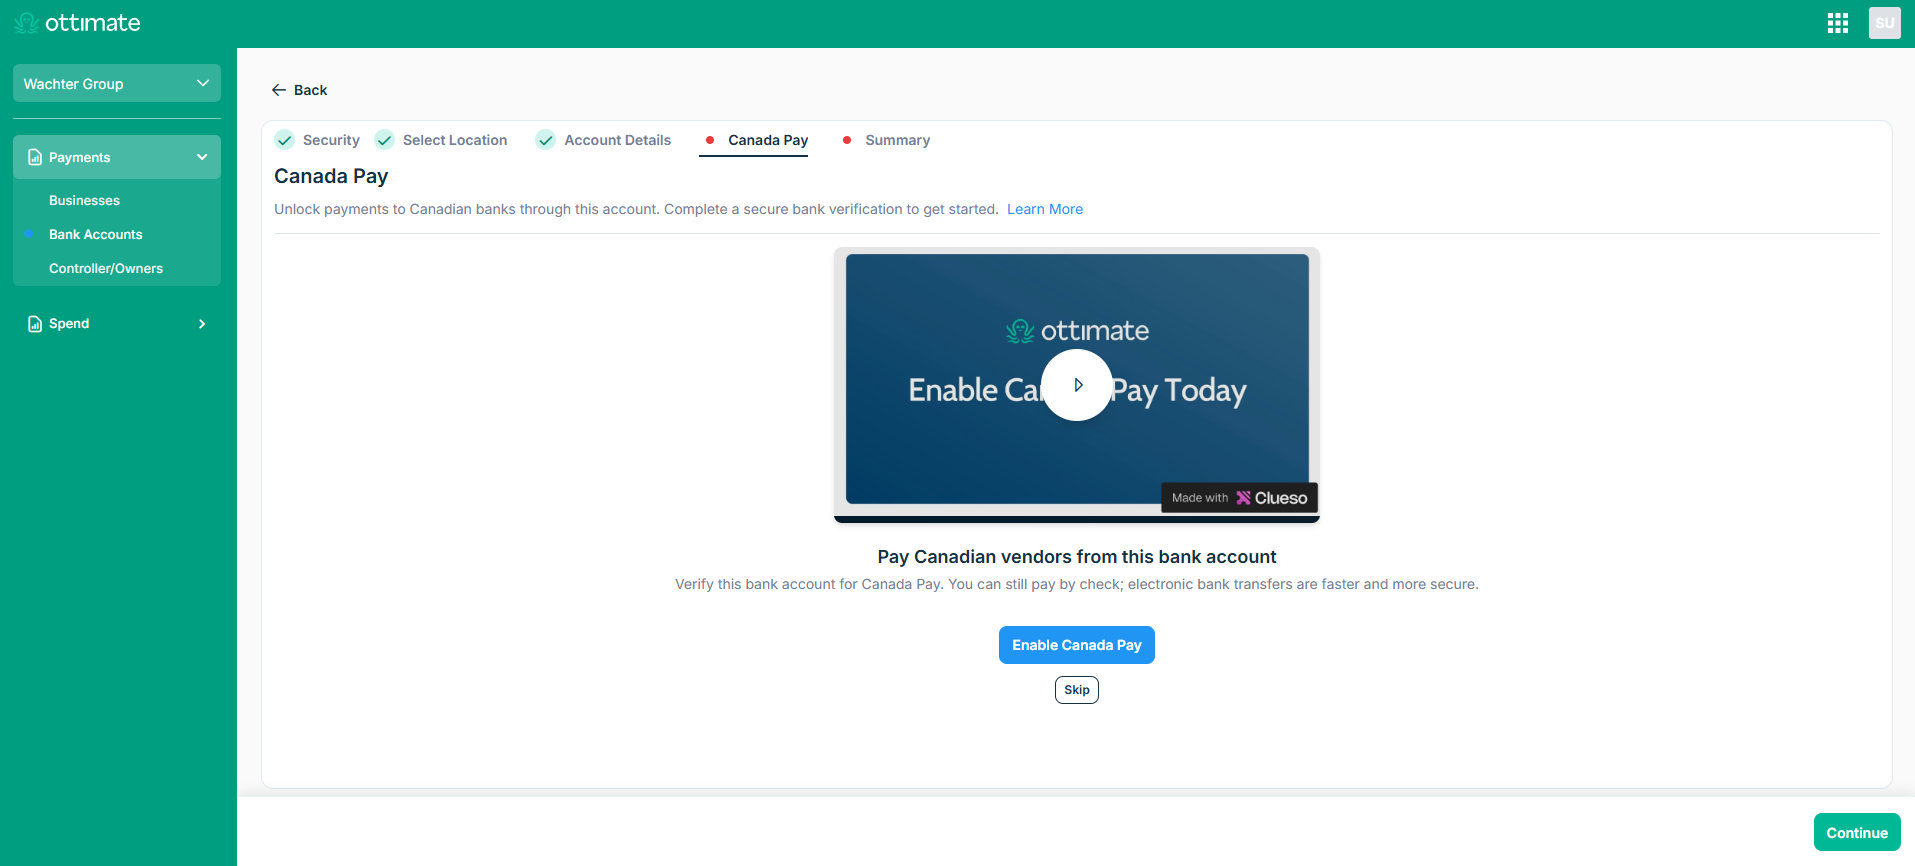
Optional Canada Pay setup
Review your information, confirm your authorization to debit the account, and select Verify to submit.
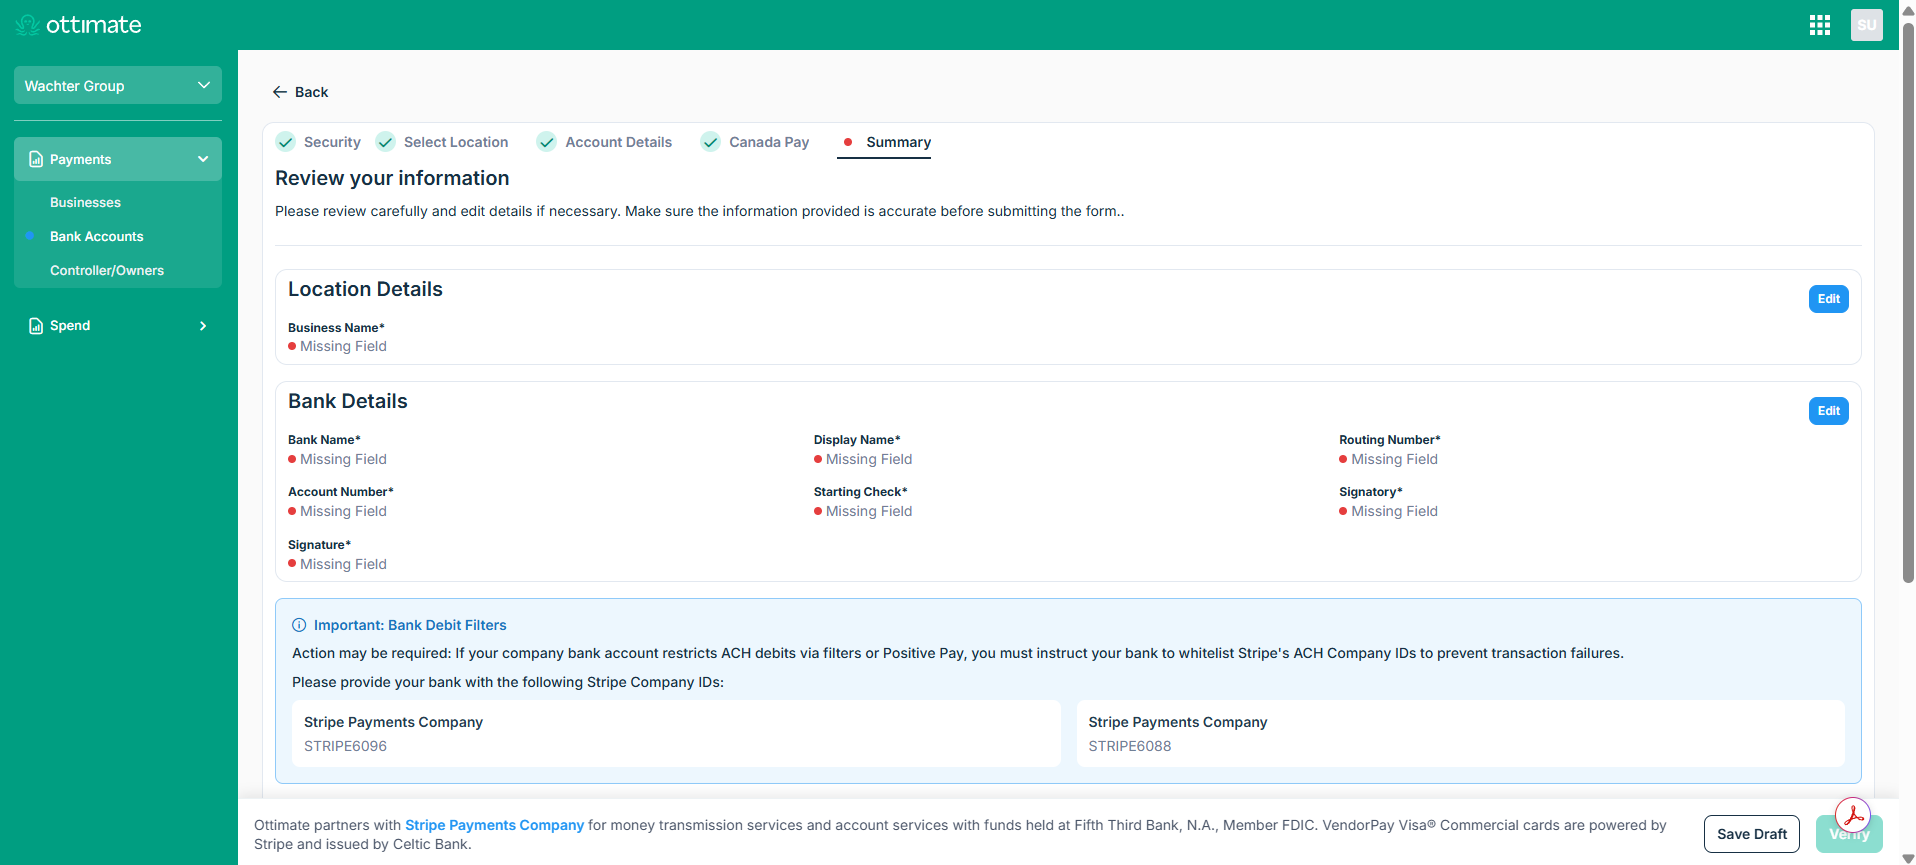
Reviewing and submitting your bank account information
Updating Your Legal Business Name (Check Header Name)
Updating the legal business name also updates the name that appears on the check header.
Old Process
Click the Settings (gear) icon in the top right.
Under Payments, select Bank Accounts.
Select the specific bank account whose business name needs to be updated.
Under Business Details, update the Legal Name field.
Save your changes.
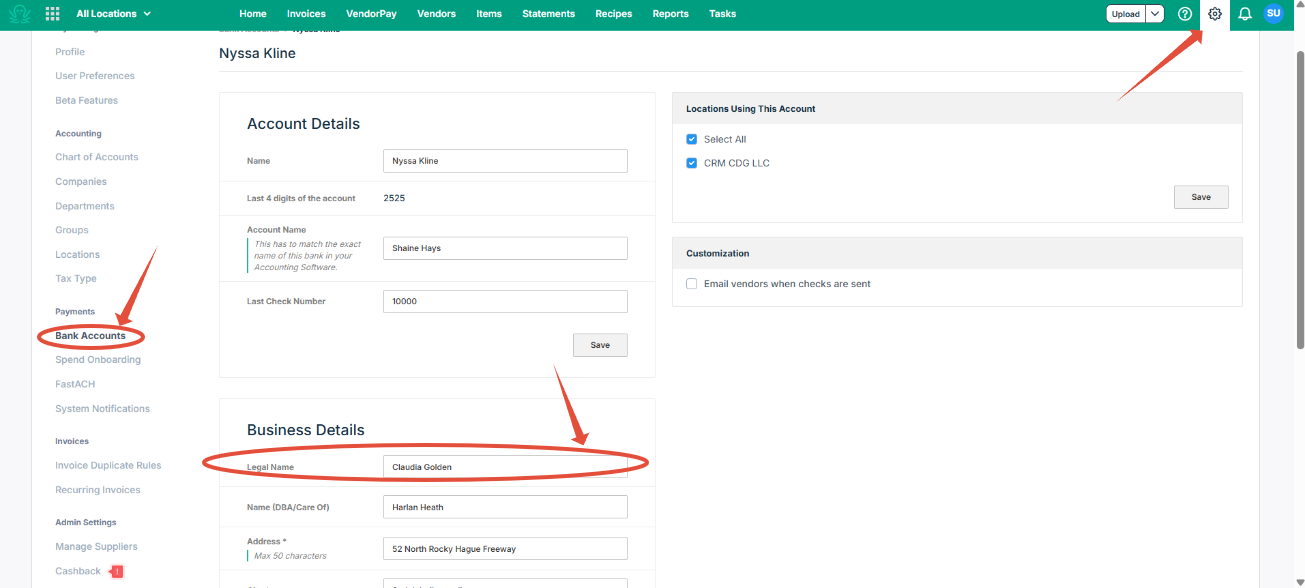
Old flow — Bank Accounts → Business Details → Legal Name
New Process
Go to Account Administration and select Businesses.
Open the business whose check header name you want to update.
Under Business Details, select the edit (pencil) icon.
In the “Revise your business details” pop-up, update the Legal Business Name field.
Select Submit.
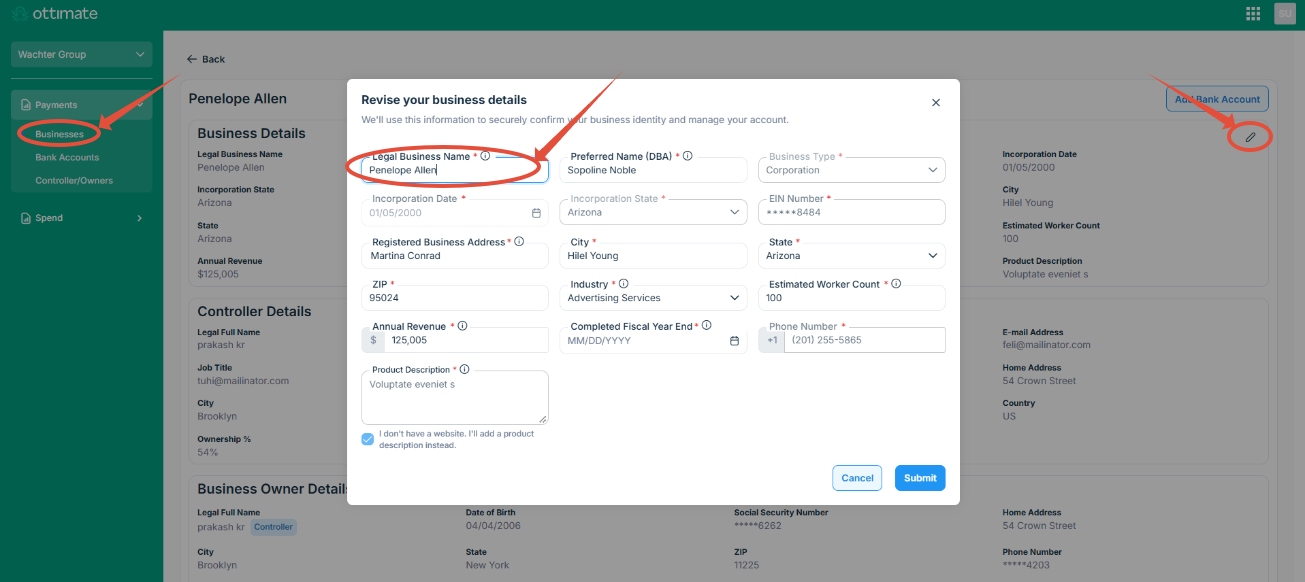
New flow — Businesses → Business Details (edit) → Legal Business Name
Updating Your Bank Name
Old Process
Click the Settings (gear) icon in the top right.
Under Payments, select Bank Accounts.
Select the specific bank account whose name needs to be updated.
Under Account Details, update the Name field.
Select Save.
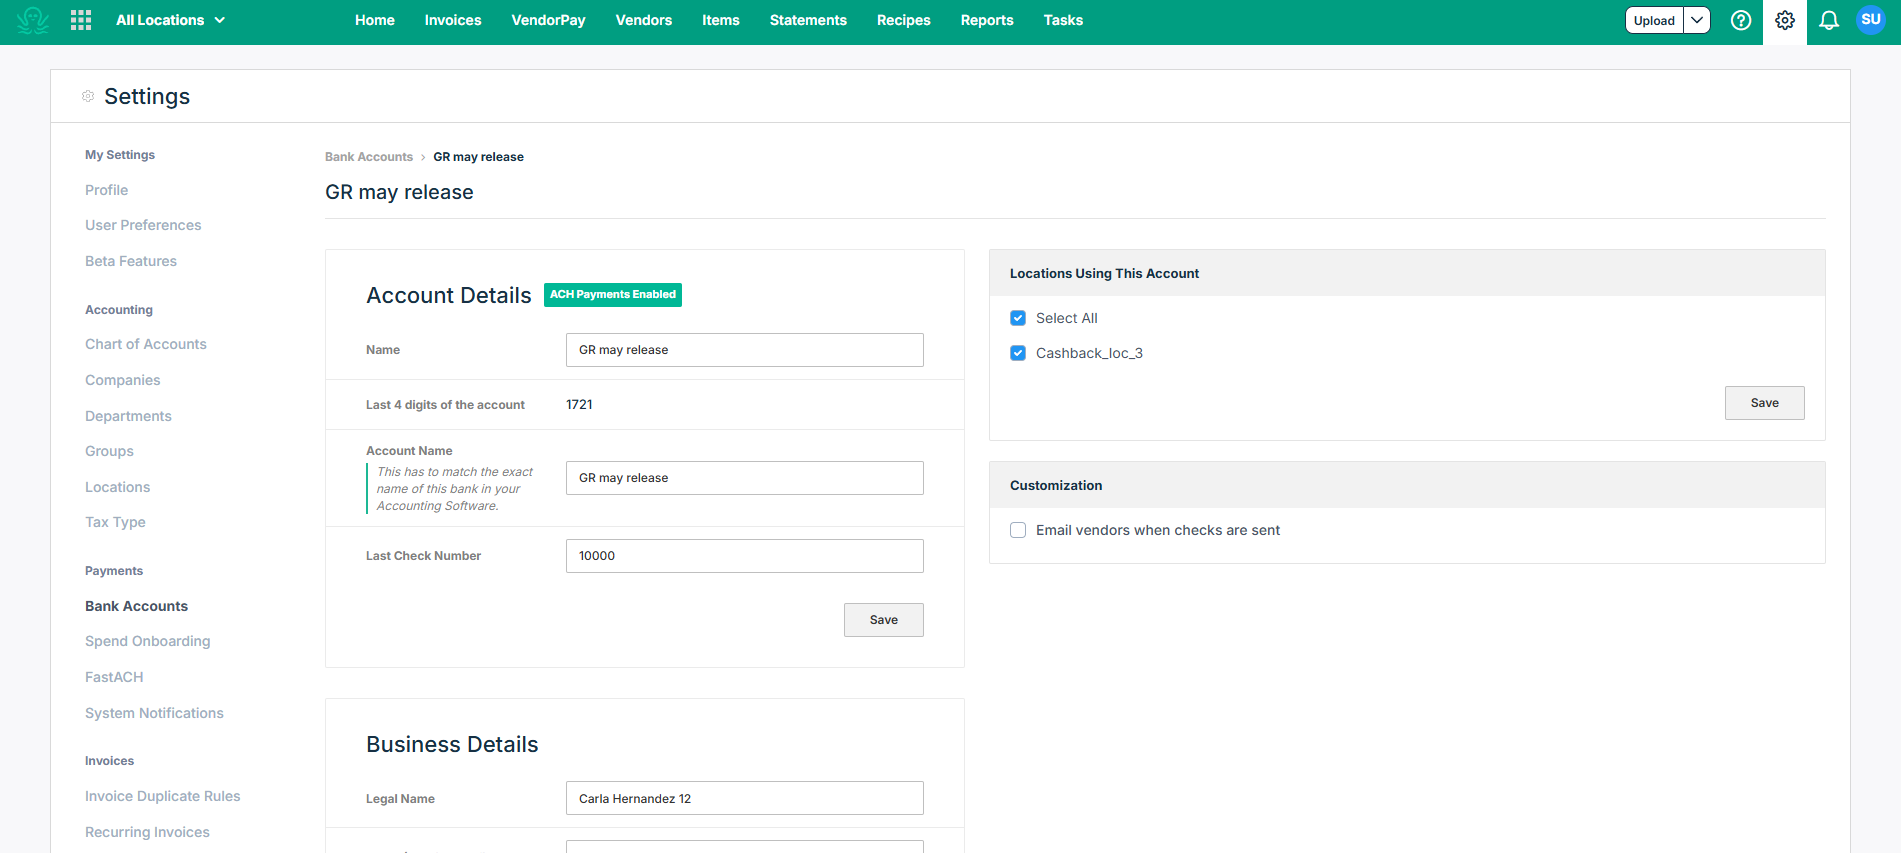
Old flow — Bank Accounts → Account Details → Name
New Process
Go to Account Administration and select Bank Accounts.
Open the bank account whose details need to be edited.
Select the edit (pencil) icon under Bank Details.
In the “Update bank details” pop-up, update the ERP Bank Name field.
Select Update.
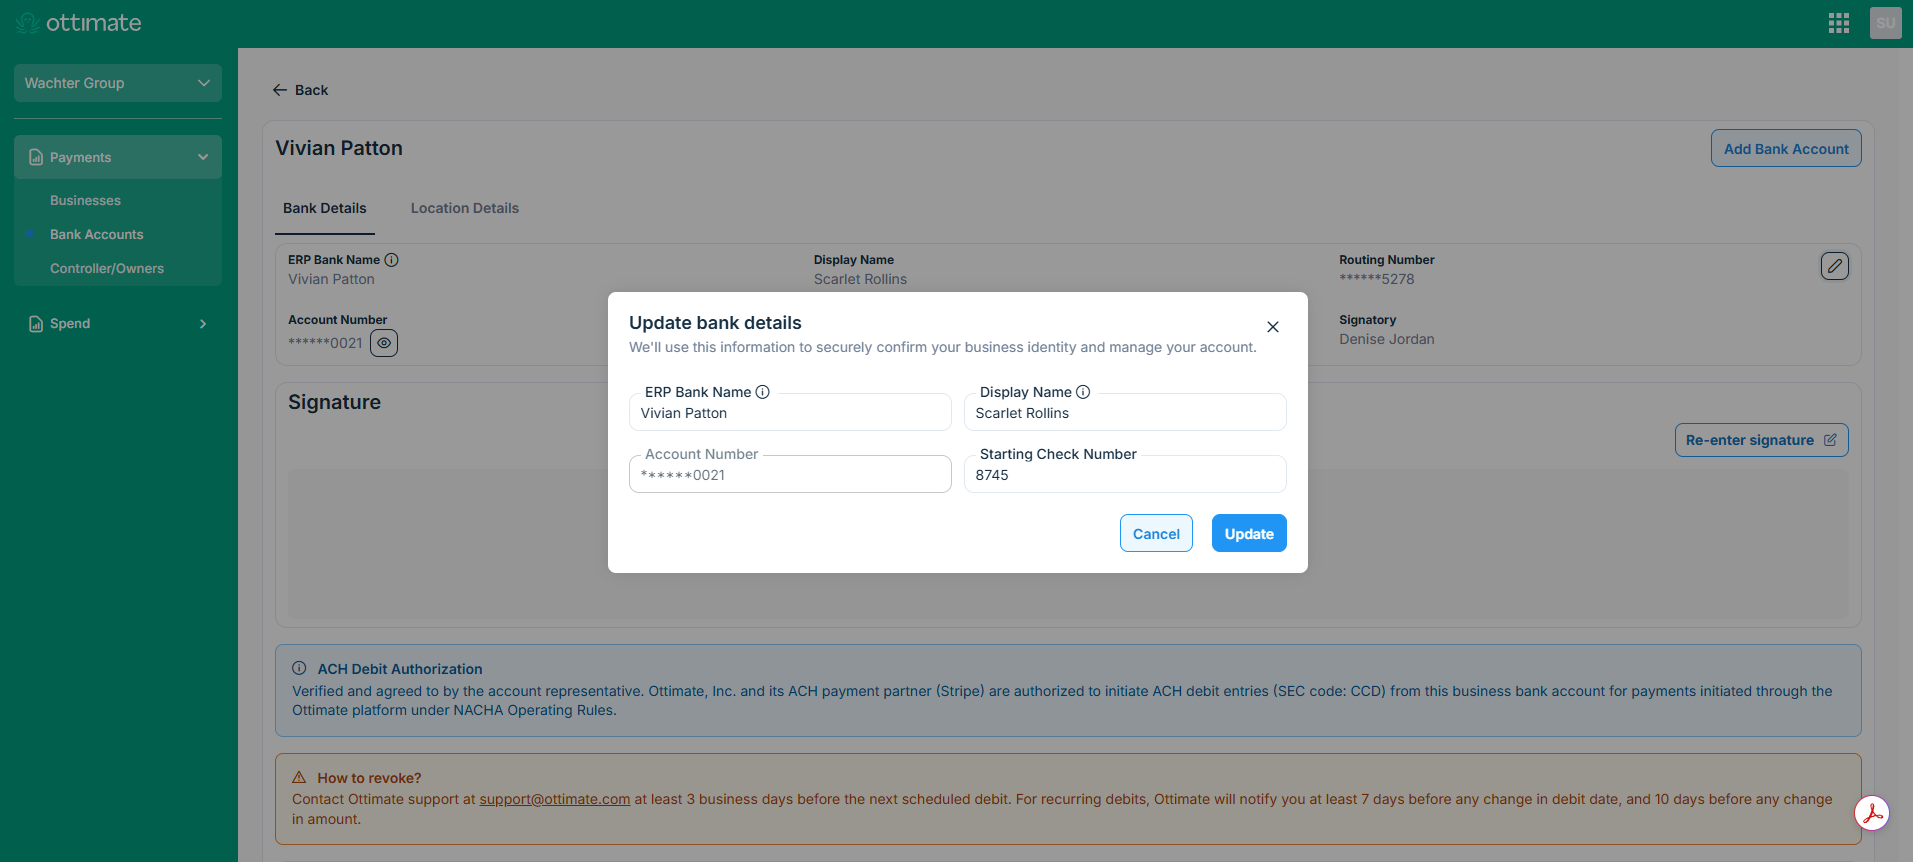
New flow — Bank Accounts → Update bank details → ERP Bank Name
Updating Your Signature
Old Process
Click the Settings (gear) icon in the top right.
Under Payments, select Bank Accounts.
Select the specific bank account whose check signature needs to be updated.
Scroll down to the Signature section and select Re-enter Signature.
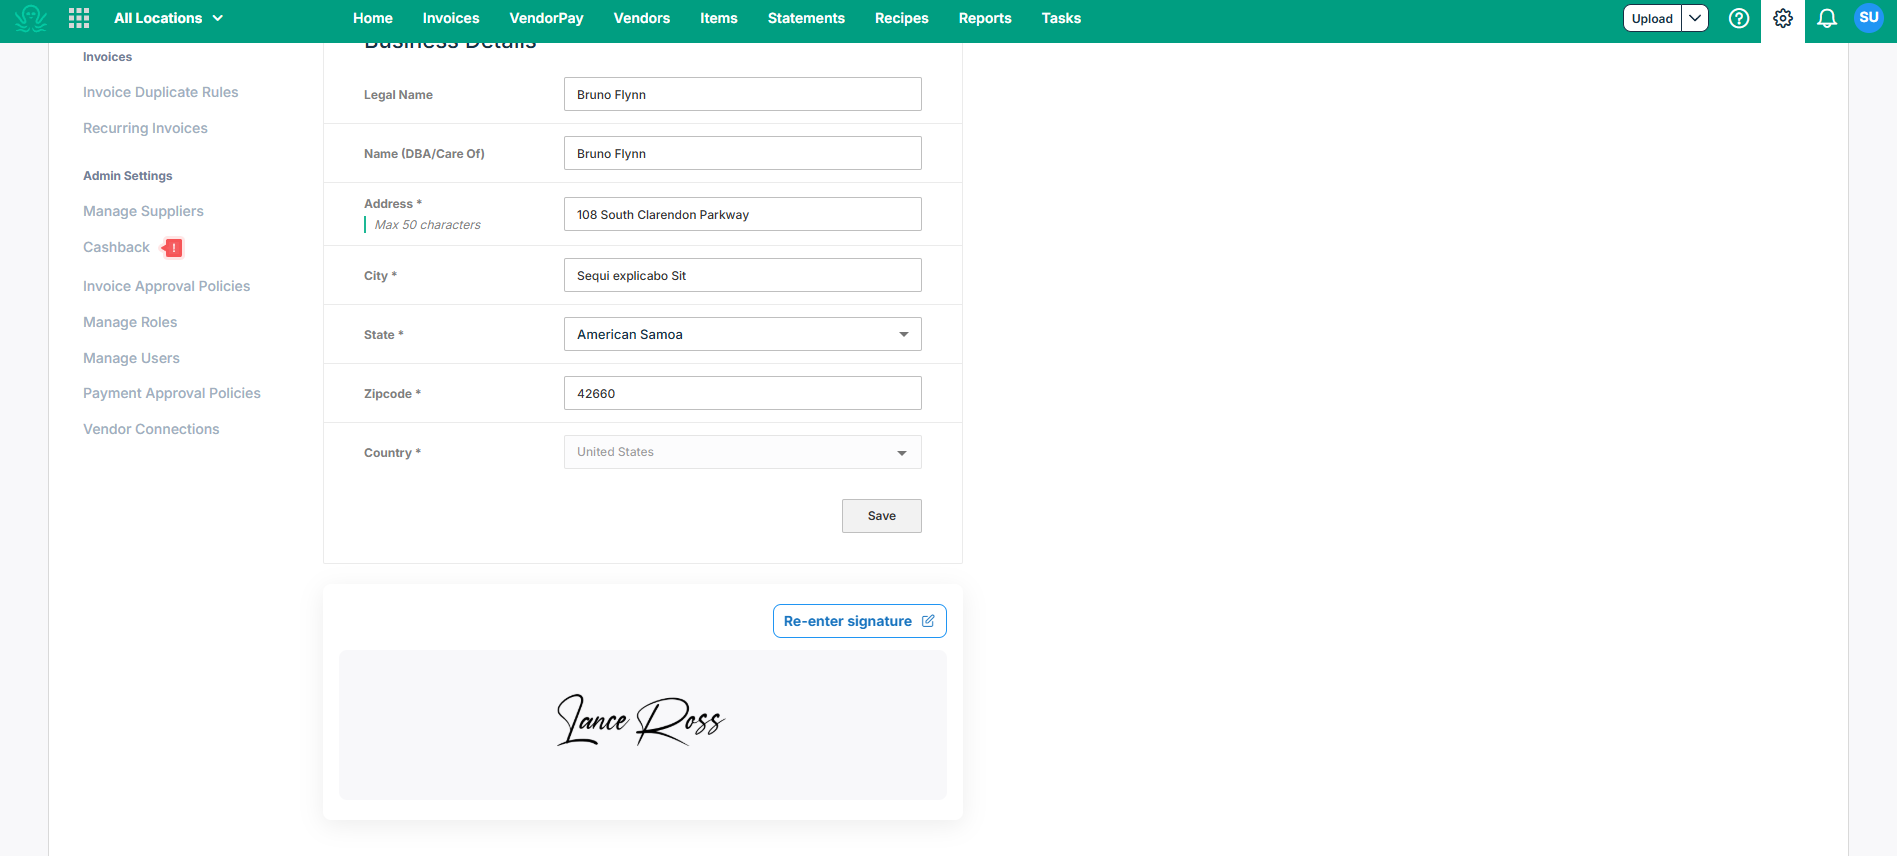
Old flow — Bank Accounts → Signature → Re-enter Signature
In the pop-up, choose how to provide your signature: Text, Draw, or Upload.
Select Accept to save the new signature.
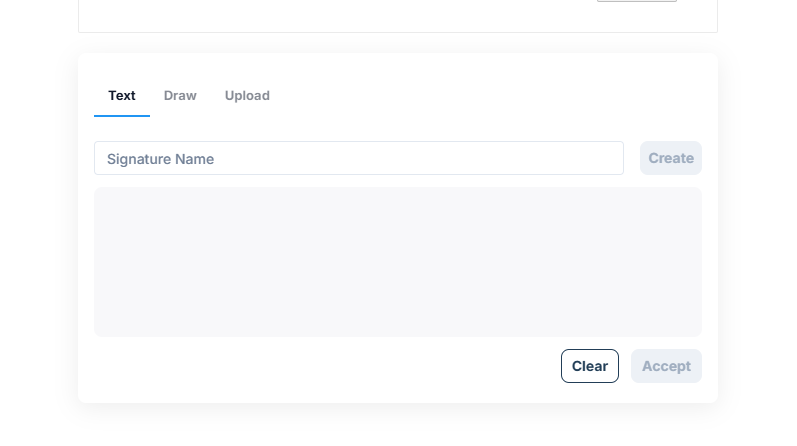
Old flow — Signature entry options: Text, Draw, Upload
New Process
Go to Account Administration and select Bank Accounts.
Open the bank account whose check signature needs to be updated.
Select Re-enter Signature.
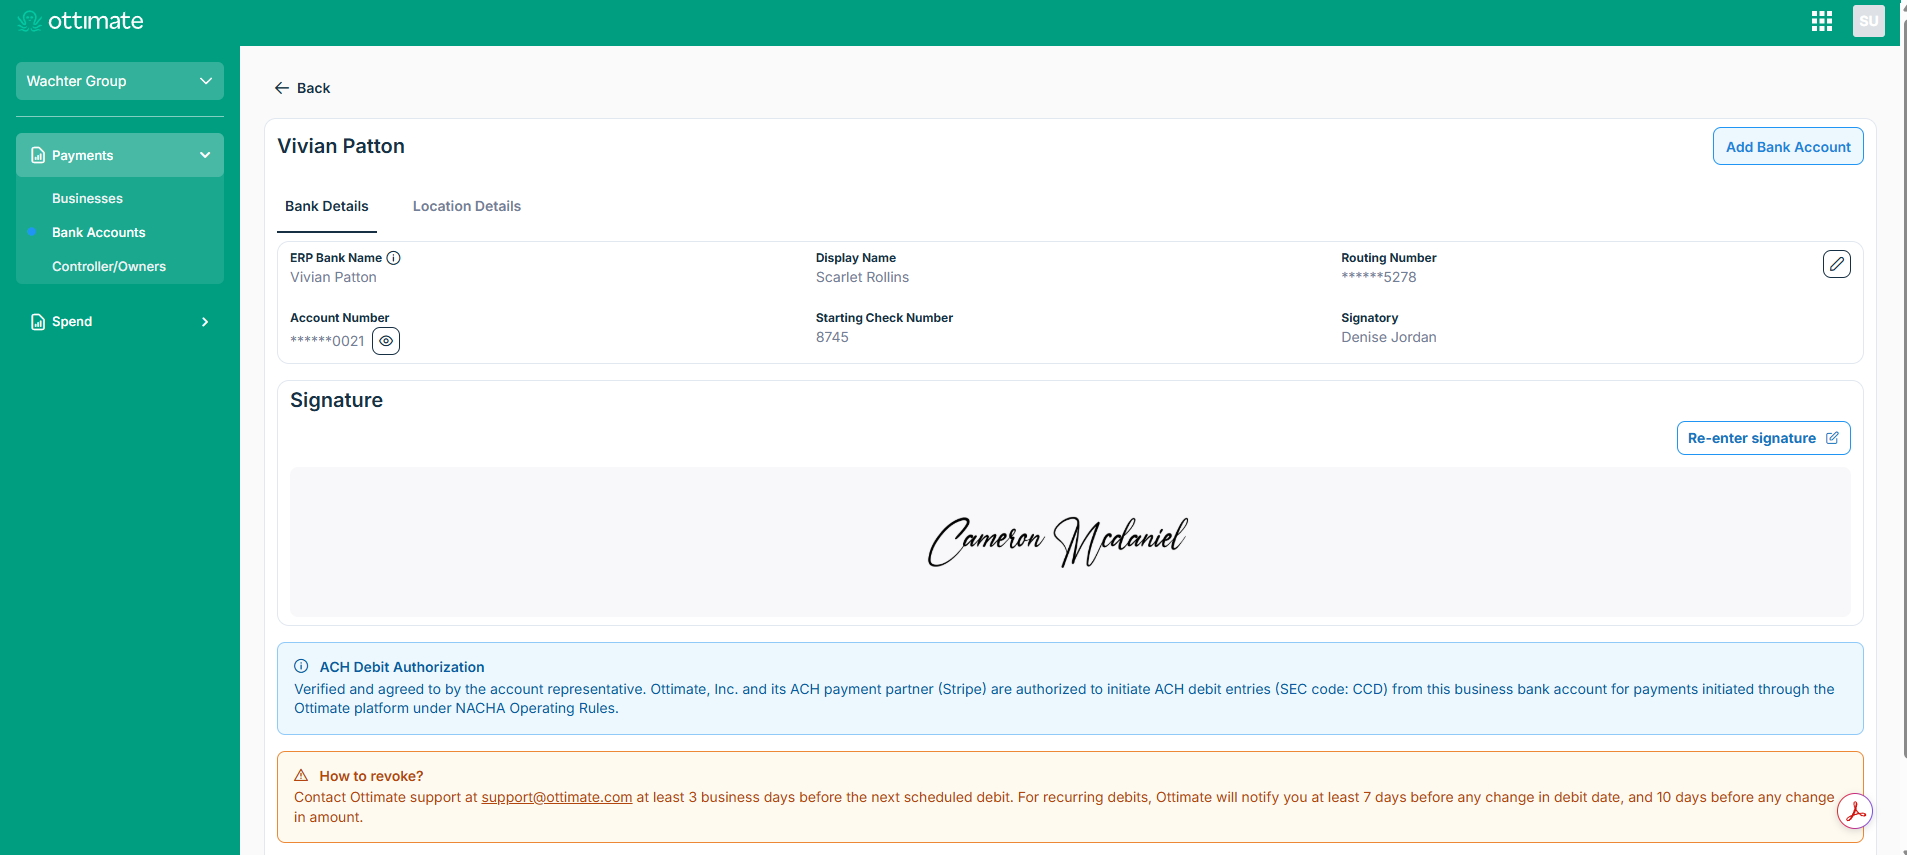
New flow — Bank Details → Signature → Re-enter Signature
In the pop-up, choose how to provide your signature: Text, Draw, or Upload.
Select Accept to save the new signature.
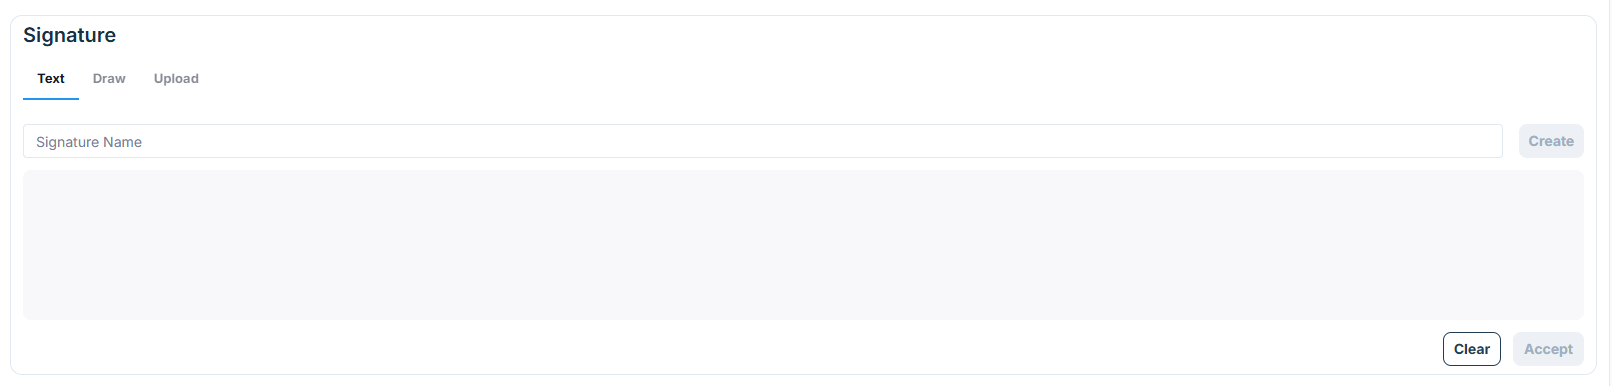
New flow — Signature entry options: Text, Draw, Upload
Updating Controller Details
This capability is available only in the new process. In the old flow, there was no way to view or edit controller details separately once they were entered during business setup.
New Process
Go to Account Administration and select Controller/Owners.
Find the controller or owner you want to update (search by name, or browse the list).
Select the three-dot (⋯) menu next to their name.
Choose Edit to update their details, or Archive to remove them.
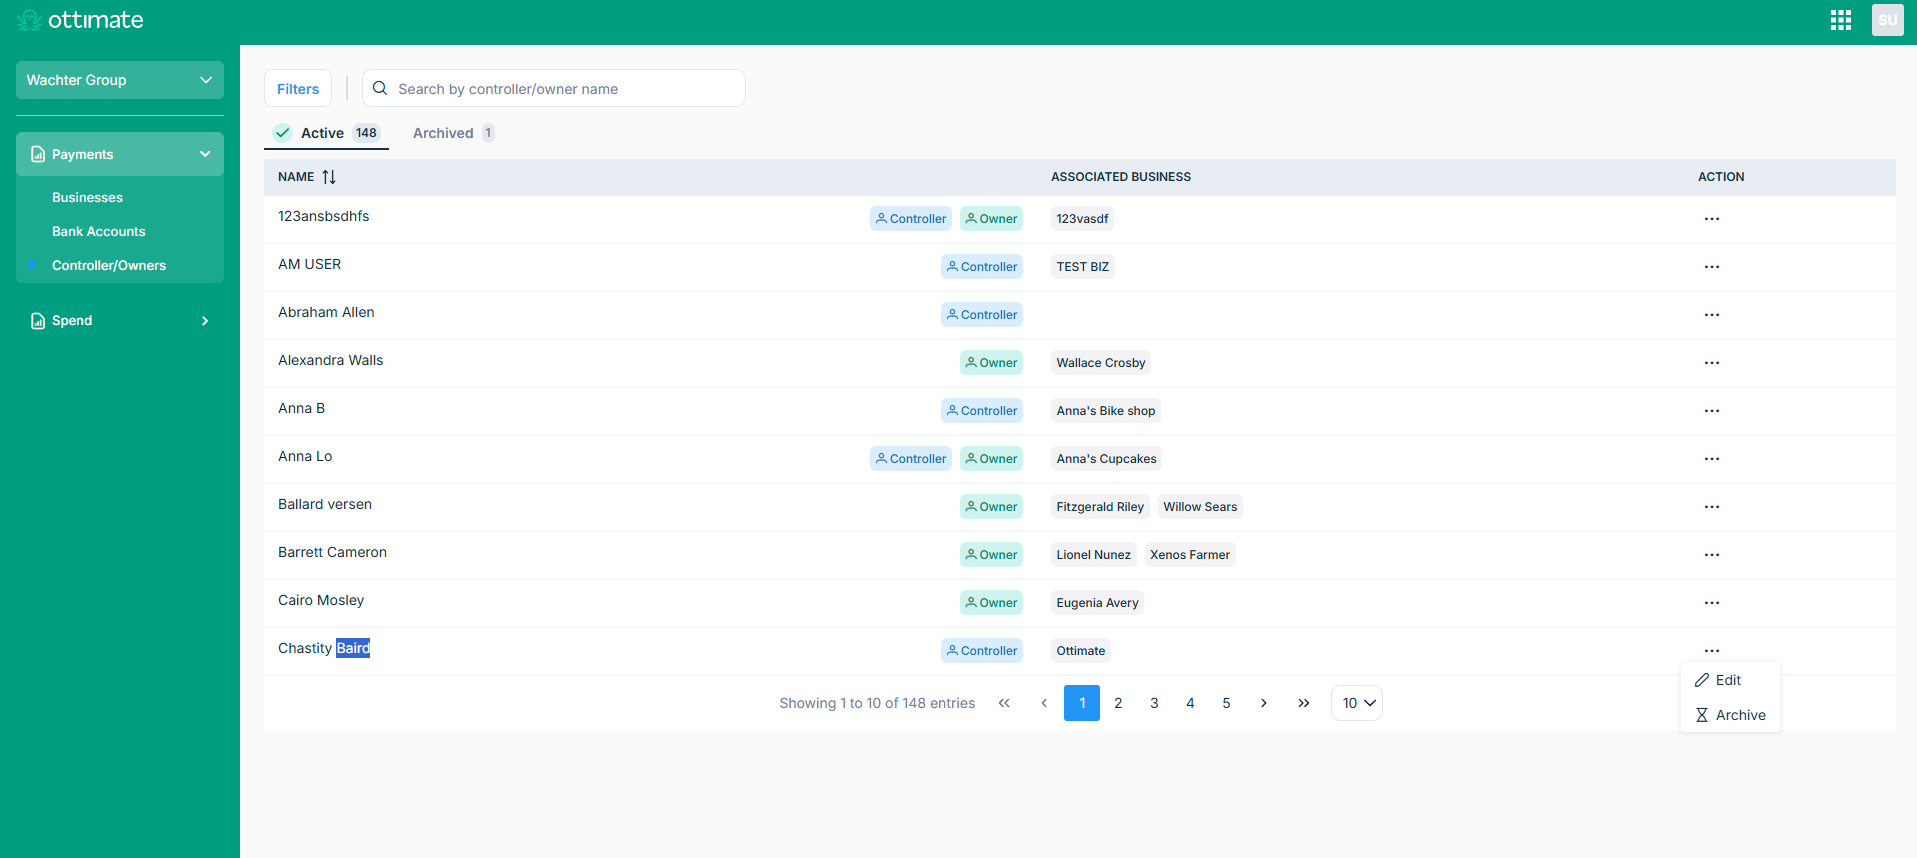
Controller/Owners list — Edit or Archive via the three-dot menu
In the “Revise your owner specifications” pop-up, update the required fields.
Select Submit.
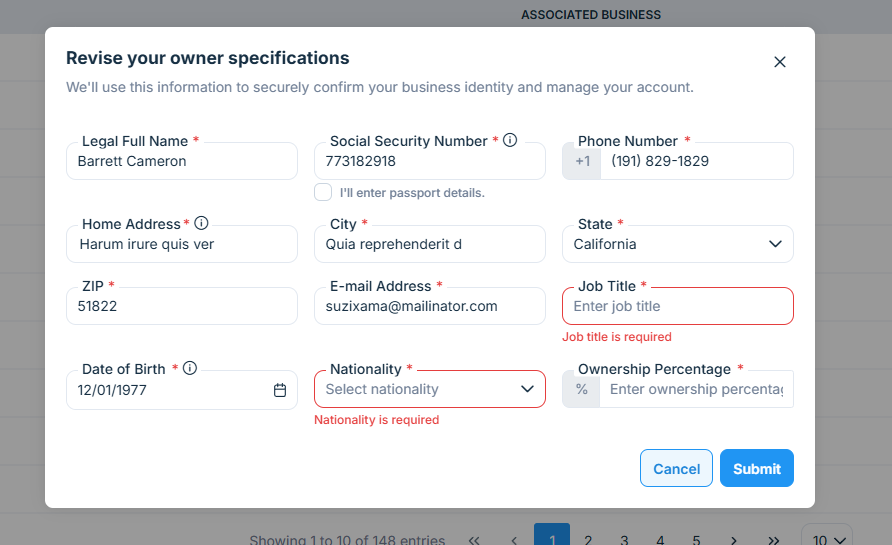
Revise your owner specifications pop-up
How the Experience Has Changed
A quick side-by-side of what's different, if you're curious:
Benefits of the New Process
Here's what these changes actually mean for you:
Looking for a Field You Remember?
A few fields were renamed to make them clearer. If you're looking for something you remember from before, here's what it's called now and which step you'll find it on:
Was this article helpful?
That’s Great!
Thank you for your feedback
Sorry! We couldn't be helpful
Thank you for your feedback
Feedback sent
We appreciate your effort and will try to fix the article