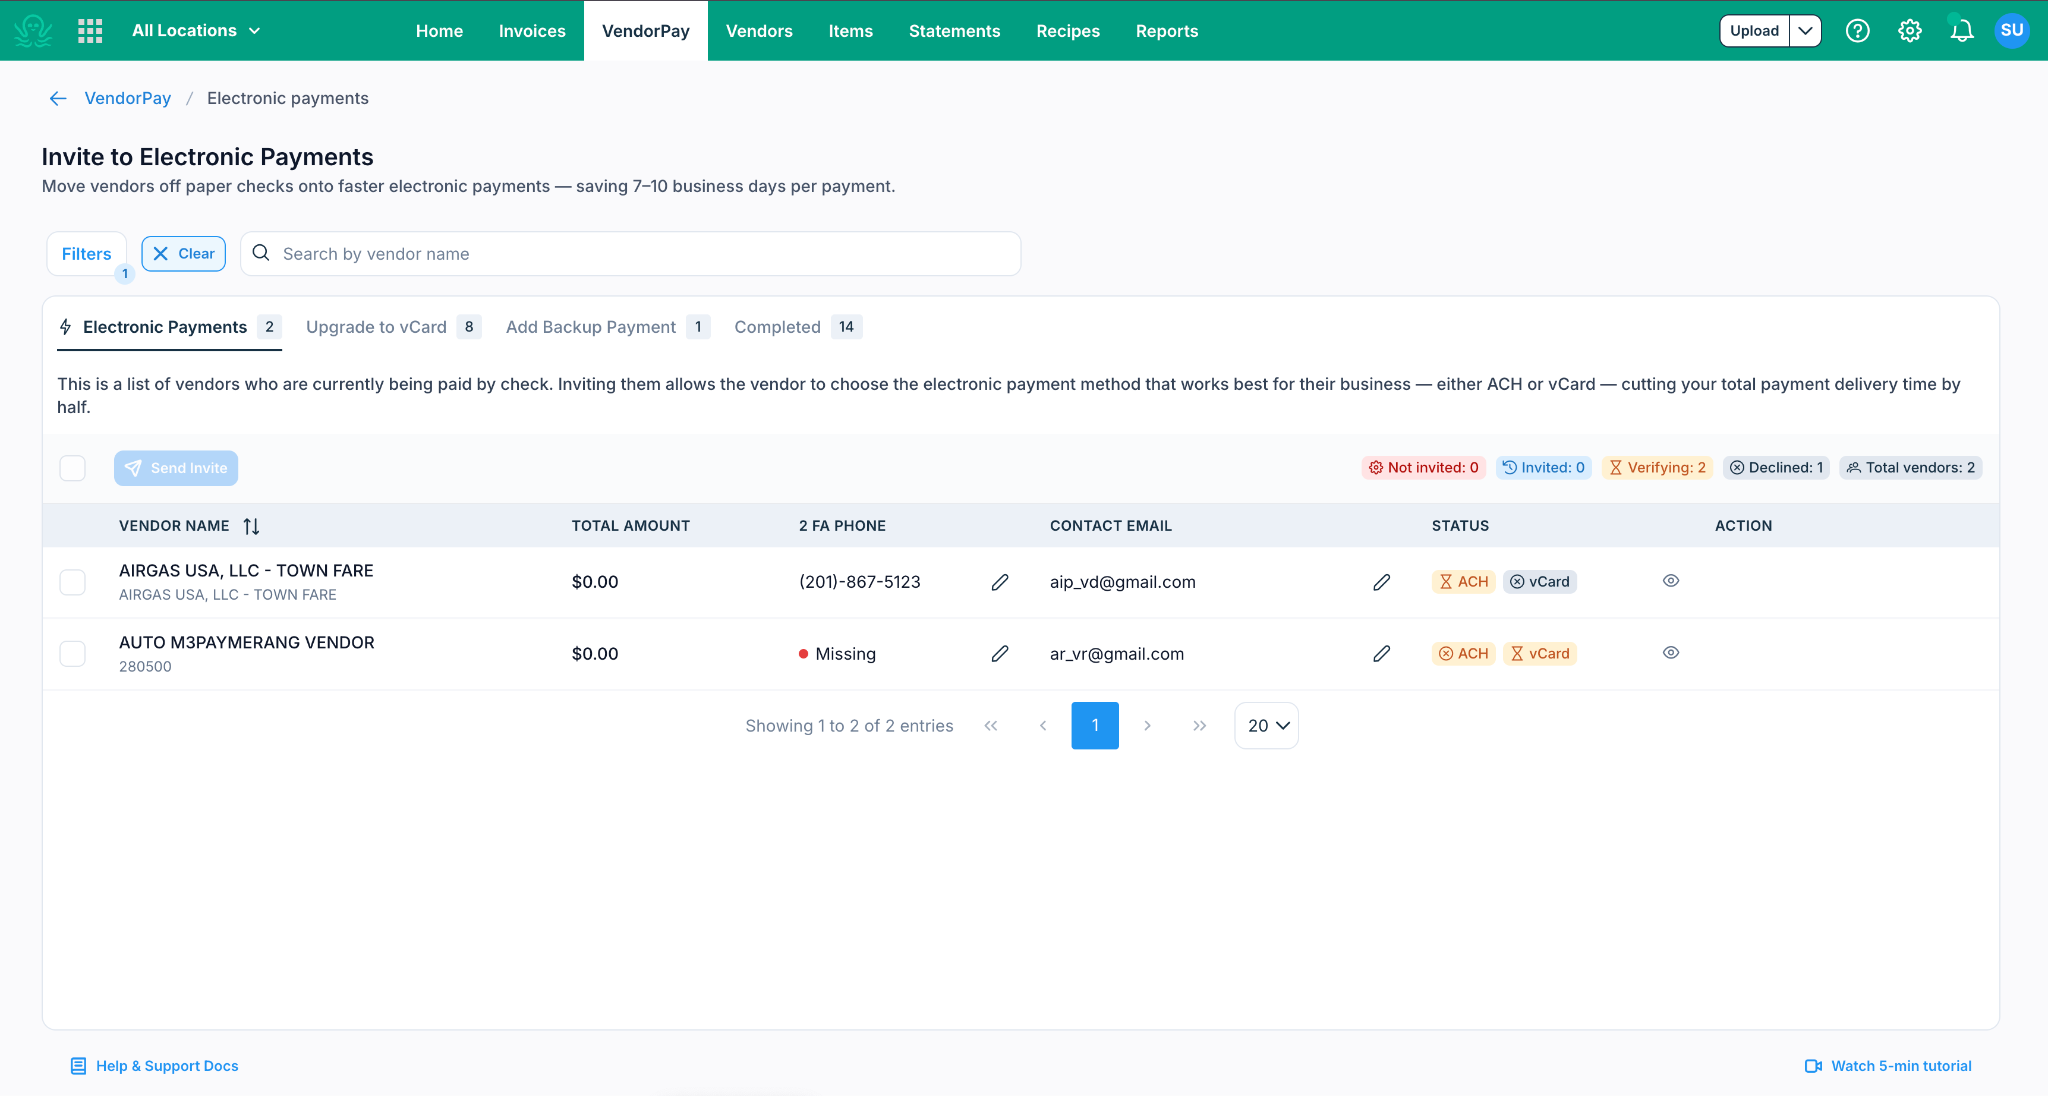
VendorPay's Invite to Electronic Payments feature helps you move vendors off paper checks onto faster, more efficient payment methods — including ACH bank transfer, virtual card (vCard), or Card on File.
How to Access
To invite a vendor to electronic payments, navigate to VendorPay and click Invite Vendors in the top right corner. From the dropdown, select Domestic Electronic Payments.
A popup will open with four tabs — each designed for a specific vendor type and workflow. The screenshot below shows the Invite Vendors button and the Domestic Electronic Payments option.
The Four Tabs at a Glance
Once the popup opens, you will see four tabs. Here is what each one is for:
| Purpose |
What Happens When You Send an Invite
When you invite a vendor from any of the first three tabs, both you and the vendor will be notified at every step. Here is a summary of the flow for each tab:
Electronic Payments
For check vendors you want to invite to ACH, vCard, or Card on File
Step 1: You send the invite
The vendor receives an invite email with a link to complete their payment setup form. You receive a confirmation that the invite was sent. When the vendor opens the link, an OTP will be sent via SMS to the phone number you entered. The vendor must enter this code to proceed with the form.
Step 2: Vendor submits the form
Verification begins (1–3 business days). Both you and the vendor are notified that the form has been submitted and review is underway.
Step 3: Verification complete
Both parties receive a confirmation email. The vendor's payment method is updated in your account.
For ACH payments, vendor banking details may be reviewed by LSEG and/or Ottimate’s Risk team during the verification process to help identify potential inconsistencies or risk indicators. These reviews are supplemental in nature and do not guarantee the accuracy, authenticity, or ongoing validity of the banking information provided.
Upgrade to vCard
For ACH vendors you want to upgrade to vCard as their primary payment method
When you invite an ACH vendor to upgrade to vCard, the vendor receives an invite to accept and complete the vCard onboarding. Once they submit, vCard eligibility is verified post successful swipe on the first vCard. Upon successful verification:
vCard becomes the vendor's primary payment method
ACH is retained as the backup payment method
Both you and the vendor receive a confirmation email
Here in vCard payments: the vendor enters an onboarding state after setup. They are considered fully onboarded after the first successful vCard transaction is processed.
Update Backup Payment
For vCard vendors you want to add ACH as a backup
When you invite a vCard vendor to add ACH as their backup payment method:
The vendor receives an invite to submit their ACH banking details
Verification takes 1–3 business days
Once verified, ACH replaces check as the backup — if a vCard payment fails, the system automatically falls back to ACH
Both you and the vendor are notified upon completion
Completed
Read-only view of all fully onboarded vendors
This tab is for reference only. It displays all vendors who have successfully completed their electronic payment setup — no invites or actions are needed at this point. Vendors appear here once their primary payment method is vCard and their backup payment method is ACH.
Using Filters
Use the Filters button at the top of the popup to narrow down your vendor list. The following filters are available:

Understanding the Columns
Each tab displays the following columns to help you manage and track your vendors:
Two-Factor Authentication (2FA) Phone Number
When a vendor clicks the invite link to complete their payment setup, they will be asked to verify their identity using a one-time passcode (OTP) sent via SMS to their phone. This helps ensure that only the intended vendor can submit banking details on your behalf.
Where to find it
The 2FA Phone column appears in the vendor table across the Electronic Payments, Upgrade to vCard, and Update Backup Payment tabs. If a phone number has not been added yet, the column will show a red Missing indicator.
How to add the phone number
Click the pencil icon next to the Missing indicator in the 2FA Phone column. Enter the vendor's phone number and save. You will not be able to send the invite until a valid phone number has been entered.
What happens next
Once the invite is sent, the vendor will receive an email with a link to complete their payment setup. When they open the link, an OTP will be sent via SMS to the phone number you entered. The vendor must enter this code to proceed with the form.
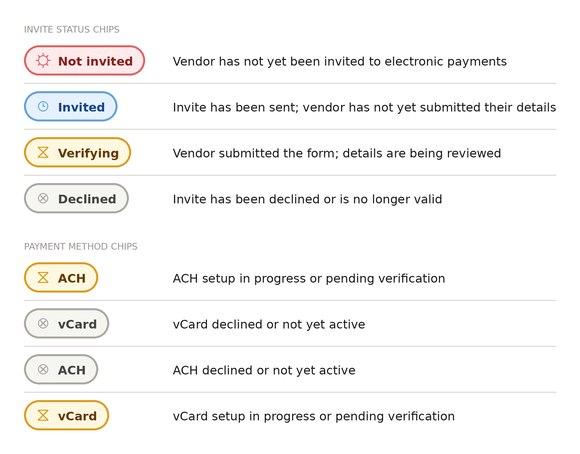
Status Indicators
Each vendor row displays a status chip matching what you see in the product. Here is what each chip means:
Was this article helpful?
That’s Great!
Thank you for your feedback
Sorry! We couldn't be helpful
Thank you for your feedback
Feedback sent
We appreciate your effort and will try to fix the article